Crocheted items can make adorable things for kids to wear. For every little princess, a crocheted crown that has some sparkle to it is PERFECT for dress-up time! It is personalized and more durable than a plastic, store-bought tiara!
Here is a link to the Free Pattern by Lotta Breyer on Ravelry.com.
Click here to head over to YouTube for my Video Tutorial!
Why I Made the Crocheted Royal Crown
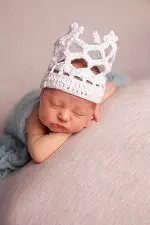
The Crochet Royal Crown is the perfect mix of dainty and regal for any little girl! I went through a phase of wanting to be a photographer, and in the process looked at a TON of newborn, family, senior, and wedding pictures. One thing that always caught my eye was newborn and toddler pictures with adorable little girls wearing a little crown or tiara. They are so adorable and fitting for those little princesses! I have wanted to make a crocheted one for years, but just never got around to it.
While growing up, I know I enjoyed dressing up and pretending to be a princess. I would always wear my mom’s high school prom dress; yes, from the 80s! Now, it wasn’t too crazy; but it DID have the frilly, pink, off-the-shoulder look! I would put this on and dance around as any little girl does!
I believe most of us have some wonderful memories of playing dress-up as little girls. I wanted to be able to give my daughters those memories, but with a little something extra. A handmade, personalized Crochet Royal Crown was just the ticket!
How I Found the Crochet Royal Crown
When I set out to make a crocheted crown from my own imagination, I failed. I have not done a lot of pattern designing, especially not for something with as much detail as I was thinking. I decided that I should not recreate the wheel and took to Pinterest (of course!).
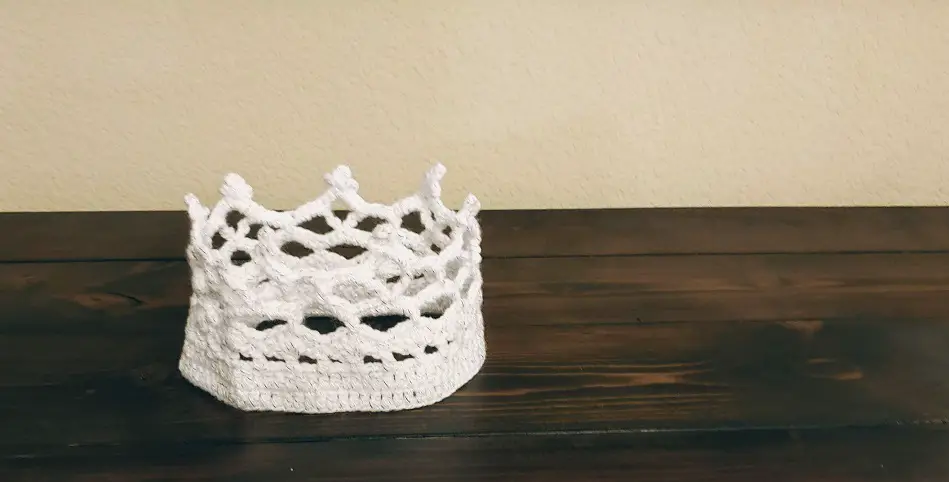
There are a plethora of free crochet patterns out there, and I found this pattern for a Royal Crown by Lotta Breyer. I liked that it had that openwork, lace look to it, making it a little more “frilly” than a lot of the other patterns. Also, I really liked that the pattern was free on Ravelry!
I crocheted two of these crowns, in two different sizes, so that both of my daughters (PG and DG) could have one. The one for DG is modified from the original pattern by eliminating some of the repeats to bring it down to newborn size.
I crocheted two of these crowns, in two different sizes, so that both of my daughters (PG and DG) could have one. The one for DG is modified from the original pattern by eliminating some of the repeats to bring it down to newborn size.
The one in this tutorial is for PG. I also decreased the number of repeats for this one because I used a heavier weight yarn, which would have resulted in a larger circumference without the alteration. (The pattern provides the note for how many stitches to eliminate/add to alter the finished circumference of the crown.)

I will probably have to make a few more as PG and DG grow, but it came together really quickly, so that shouldn’t be a big deal.
Let’s get on with HOW to actually make the Crochet Royal Crown by Lotta Breyer!
Crochet Royal Crown Pattern
Here is the free pattern by Lotta Breyer on Ravelry.com.
Crochet Royal Crown YouTube Video Tutorial
Notes About Changes Made
First…changes in materials.
I used I Love This Yarn! Metallic in white, available at Hobby Lobby. This is a worsted weight (4) yarn. The pattern calls for a lightweight (3) cotton yarn. I made this change for two reasons.
One, I had this yarn already in my stash from a bow that I made for one of my nieces which obviously did not use too much of the skein. Yay for stash-busting projects! I’m pretty sure I could make at least 5 of these crowns out of 1 skein of this yarn.
Two, I decided that using a heavier-weight yarn would help make the project stiffer, which would decrease the amount of starch/stiffener thatI needed. I did know that this would make the project bigger, but I was okay with that and knew I could modify the repeats as needed.
Second, I eliminated ONE repeat.
In the pattern, it says to alter sizes, add or subtract 12 chains. This is to add or subtract one “repeat” in the pattern. You can change it by as many multiples of 12 as you need to get the circumference you want just remember that it doesn’t change the height of the project, so the proportions may look funny if you alter it significantly.
Third, I skipped the slip stitch to the treble crochet on round 8.
When I tried the slip stitch, it made it kinda lopsided. I might have been doing it wrong, but when I just skipped that, it worked out better for me.
ERRATA
If you go straight off the pattern without the above modifications, still make sure you look at the ERRATA on the Ravelry page. (Errata means “a list of errors,” which I had to look up.) There is a mistake in the PDF that is corrected with this section, but it isn’t on the PDF itself. Just be aware.
Final Size
The size of my final project is approximately 19 inches in circumference and 4.5 inches in height. This is slightly bigger than the 18-inch circumference stated in the pattern. Seems like the 18 inches stated for a two-year-old in the pattern is very accurate because my 19-ish inch crown is a little bit big for my two-year-old daughter.
With the link to Lotta Breyer’s pattern on Ravelry.com and my video tutorial, I am trying to appeal to multiple learning styles. Is there another way that would help YOU learn easier?? Let me know in the comments!
Now it is time for YOU to get Crafty with Ashy! I would LOVE to see YOUR finished Crocheted Royal Crown (credit Lotta Breyer for pattern), so post a picture in the comments!
Be sure to subscribe and follow me so you don’t miss any inspiration!
All pictures and videos provided in this post are property of Crafty with Ashy. The Royal Crown Pattern is property of Lotta Breyer and has not been reproduced here for that reason. Please credit her for anything you make based off of her pattern.