Starting and ending rows in crochet can be confusing at times. Knowing what to do and where to do it is vitally important to have straight edges and a symmetrical finished project. If you don’t do it right, your edges will be wavy, or your work will shrink or grow from start to finish.
To finish a row when you plan to crochet another row, crochet the number of chain stitches that corresponds to the stitch you are using (1 for single, 2 for half-double, etc.), then turn your work and crochet the next row. If you are done, “fasten off,” which means cut your yarn, pull it through the loop, and then tighten it to make a “knot.”
So that is the very basic answer to the question, but if you are like most people beginning to crochet, that does not really mean a lot to you. What do you mean crochet some chain stitches to the height of my stitches? I don’t get the term “fasten off.” Continue reading for a detailed description of these things and variations of how to do them!
Why is Starting and Ending Rows Correctly Important
I want to start this detailed post by telling you why it is so important to get this right. One of the main things that will affect how your finished project edges look is how and where you stop and start your rows.
By ensuring you are placing your starting and ending stitches in the correct place, you are setting your project up for successful symmetry and nice, even, smooth edges.
As you will see, there are many variations, but if you choose any one of them and do it consistently for your whole project, you should end up with that clean finish you are looking for!
How to Start the Next Row of Crochet After Turning
So, this post was originally about how to end a crochet row, but it makes more sense to start with how to start the row. The way that you start your row can actually change the way that you end a row. So, let’s dive in!
There are two main ways to start a row of crochet that apply to all except for the single crochet. The first way is when the turning chains count as a stitch, and the second is when they don’t. In single crochet, the turning chain never counts as a stitch.
Often, a pattern will specify which method to use, but if you are strongly biased toward one of them, you can alter the pattern pretty easily.
I am going to lump the description for the half-double crochet, double crochet, and treble crochet together because they are all actually the same for where to place your first stitch in each technique.
Single Crochet
When starting a new row of single crochet, you will place your hook in the last stitch of the previous row. This is because the turning chain DOES NOT count as your first single crochet stitch. This is the only stitch where I have never seen an exception to this rule.
Half-Double Crochet, Double Crochet, and Treble Crochet
Variation 1: Turning chains count as a stitch
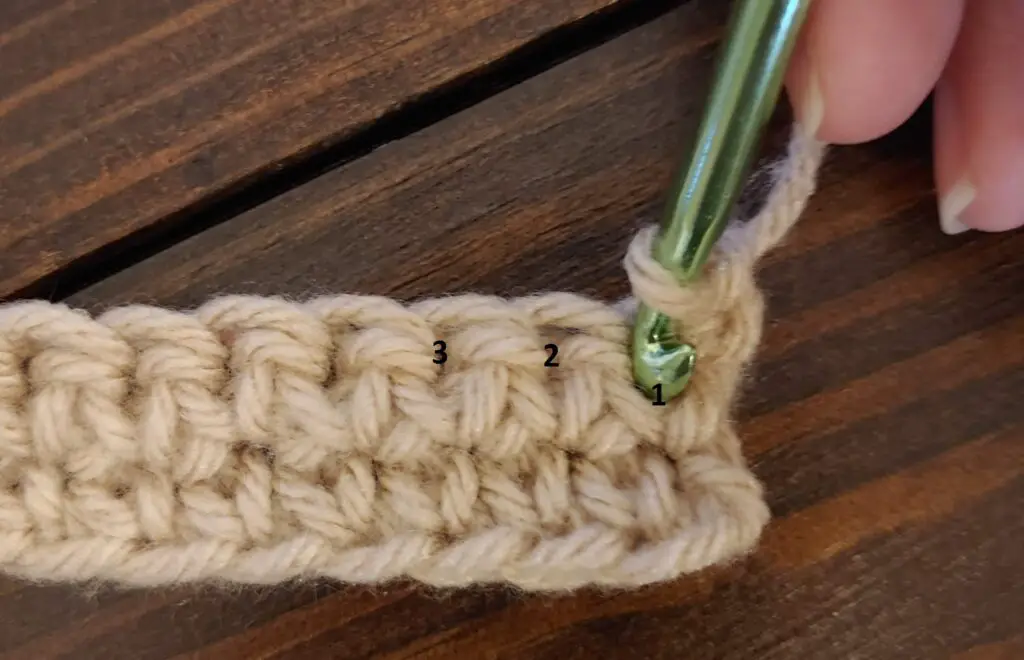
When you are counting the turning chains as a stitch, you will place your hook in the second to last stitch of the previous row. So you are essentially skipping crocheting into the first stitch from your hook because your chains that are above that stitch count as the first stitch of the new row.
Variation 2: Turning chains DO NOT count as a stitch
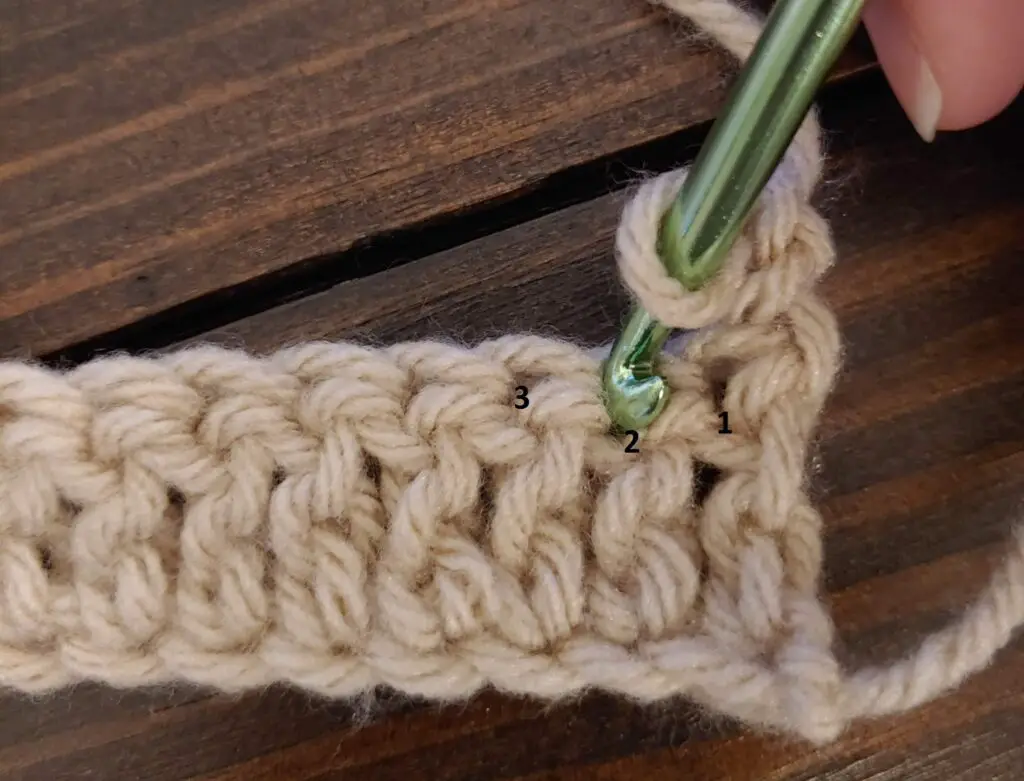
When you are NOT counting the turning chains as a stitch, you will place your hook into the last stitch of the previous row. The turning chains and the first stitch will kind of squish together.
How to Finish a Row of Crochet When Starting a New Row
So, how you finish a row in crochet includes two things in my mind. Number 1 is where you work your last stitch, and number 2 is chaining prior to turning. So, let’s break it down that way.
Where to work your last stitch
As with how to start the row, single crochet is different, but the other three are the same, so I will again lump those together in the descriptions.
Single Crochet
Just like there is no exception to how to start your row, there are no exceptions to where to end your row.
You will insert your hook into the first single crochet of the previous round (so the last stitch). Do not insert your hook into the turning chain. This is one of the places you can get uneven edges if you accidentally add a stitch to the row by putting one in the turning chain.
Half-Double Crochet, Double Crochet, and Treble Crochet
Variation 1: Turning chains count as a stitch
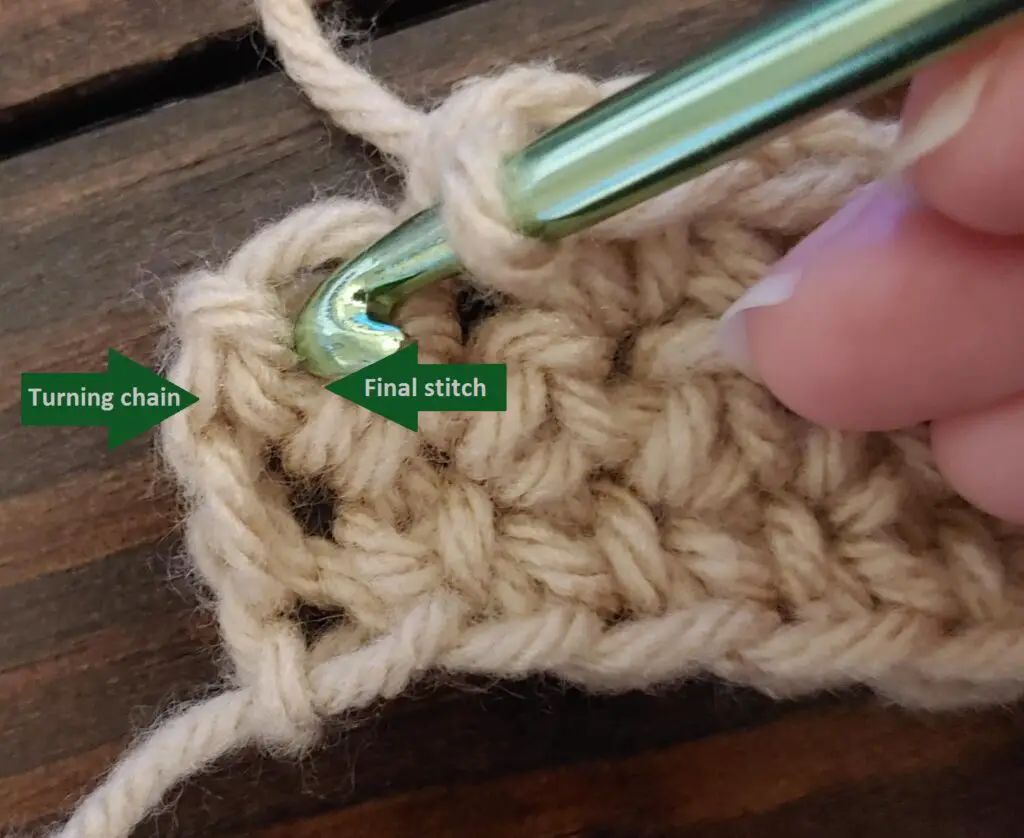
When the turning chains count as a stitch, you will insert your hook into the top chain of the turning chains to work your final stitch of the row.
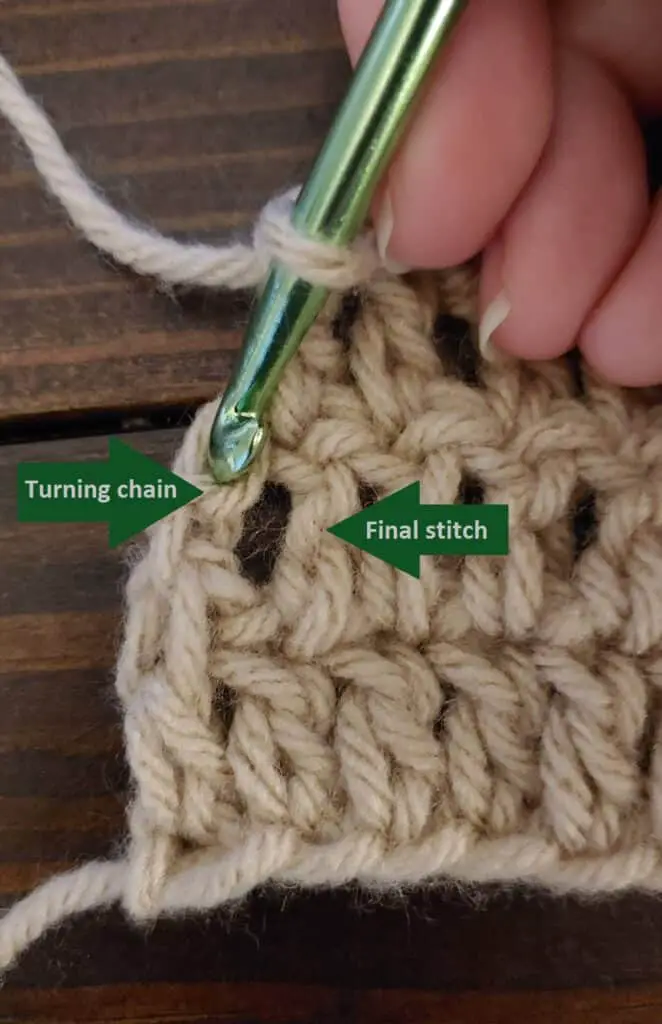
Variation 2: Turning chains DO NOT count as a stitch
When the turning chains do not count as a stitch, you will insert your hook into the first stitch that you made on the previous row to work your final stitch of the row.
You will NOT work a stitch into any of the turning chains at this point. Again, this is where you may accidentally add stitches to your row and have uneven edges.
Chaining Prior to turning
The purpose of chaining at the end of your row is to get up to the working height of the next row. The specific number of chains is what typically varies from person to person.
I would say that the number of chains prior to turning is a pretty big crochet controversy. I definitely have my preferred way of doing it, but you choose what you like best! There really isn’t a wrong way, just preferred ways. Don’t let someone tell you you are doing it wrong if you are using the opposite technique as they are.
Single Crochet
Variation 1: Chain 1
This is the “standard” way to do it. You chain one and then turn your work. This one chain results in a height similar to the height of the single crochet stitch.
Variation 2: Chain 0
This is the “altered” way to end the row. You can get away without chaining for a single crochet because the height of the stitch is so small. Typically, it is recommended to pull the loop of your last stitch slightly farther through the work to have a looser starting single crochet.
Half-Double Crochet
Variation 1: Chain 2
This is the “standard” way to do it. You chain two and then turn your work. These two chains result in a height similar to the height of the half-double crochet stitch.
Variation 2: Chain 1
This is the “altered” way to end the row. Chaining one instead of two results in a slightly lower profile turning chain.
The benefit that people report is that it results in a smaller gap between your chain and your first half-double crochet stitch when you are counting the chain as a stitch and that it results in less of a “bump” on the edge of your work when you are not counting the turning chain as a stitch.
Double Crochet
Variation 1: Chain 3
This is the “standard” way to do it. You chain three and then turn your work. These three chains result in a height similar to the height of the double crochet stitch.
Variation 2: Chain 2
This is the “altered” way to end the row. Chaining two instead of three again results in a slightly lower profile turning chain.
The reason people choose this variation is the same as the variation of chaining one versus two for the half-double crochet.
Treble Crochet
Variation 1: Chain 4
This is the “standard” way to do it. You chain four and then turn your work. These four chains result in a height similar to the height of the half-double crochet stitch.
Variation 2: Chain 3
This is the “altered” way to end the row. Chaining three instead of four will again result in a slightly lower profile turning chain.
The reason people choose this variation is the same as the variations for half-double and double crochet stitches of chaining, one less than is “standard.”
Another Variation To Ending/Starting Rows: The Chainless Method
I am discussing the chainless method separately because it actually changes both the way you start the row and the way you finish the row.
The reason that this technique is out there is because when you count the turning chains as a stitch, it does leave a small gap between the chains and the first actual stitch of the row. This does address that “problem” if you consider it to be one.
Single Crochet
In this variation, a single crochet worked just like the chain 0 variation above. All the other stitches are different, though.
Half-Double Crochet, Double Crochet, and Treble Crochet
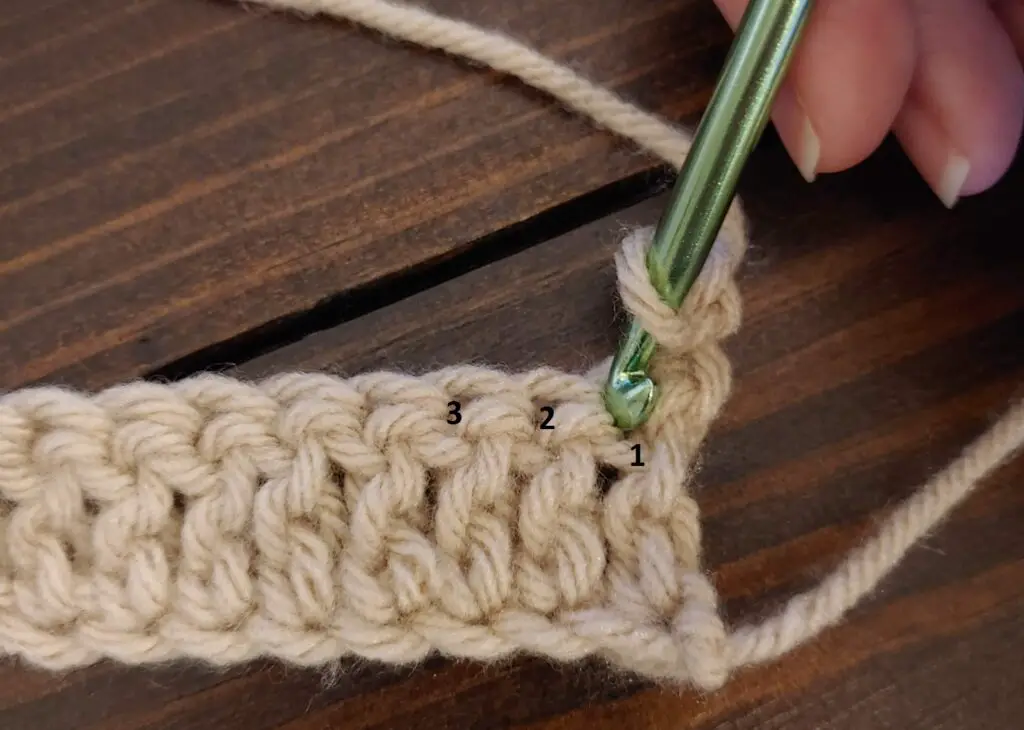
For the half-double, double, and treble crochet stitches, you start a row by working a “fake” stitch as your first stitch, and then you work your “second” stitch into the 2nd to the last stitch of the previous row (2nd stitch from your hook).
When you reach the end of the row, you will place your final stitch into the top of that “fake” stitch.
The actual technique for making the fake stitch varies depending on whether you are using the half-double, double, or treble crochet. There are also a few variations out there for how to make the “fake” stitches.
For the sake of not making this post a book, here is a link to a VERY detailed post with written, pictorial, and video tutorials for a chainless row turn technique. JessieAtHome appears to have put a TON of work into this post.
There are other variations of the chainless turning method out there. if you want other options, I recommend going to YouTube and searching chainless turning for your specific stitch.
*I would like to note that I have never actually tried this, or any other, chainless turning method because the small gap between my turning chain and my first actual stitch does not bother me enough to learn a new way. Maybe I’m just lazy, I don’t know. The pictures the tutorials show do look nice though!
How to Finish a Row of Crochet When the Project is Complete (Last Row)
To finish a crochet project worked in rows, the pattern generally says, “Fasten off and weave in ends.” Well, what the heck does that mean? They make it sound so obvious, don’t they?
Here is a How-To guide to fastening off your crochet
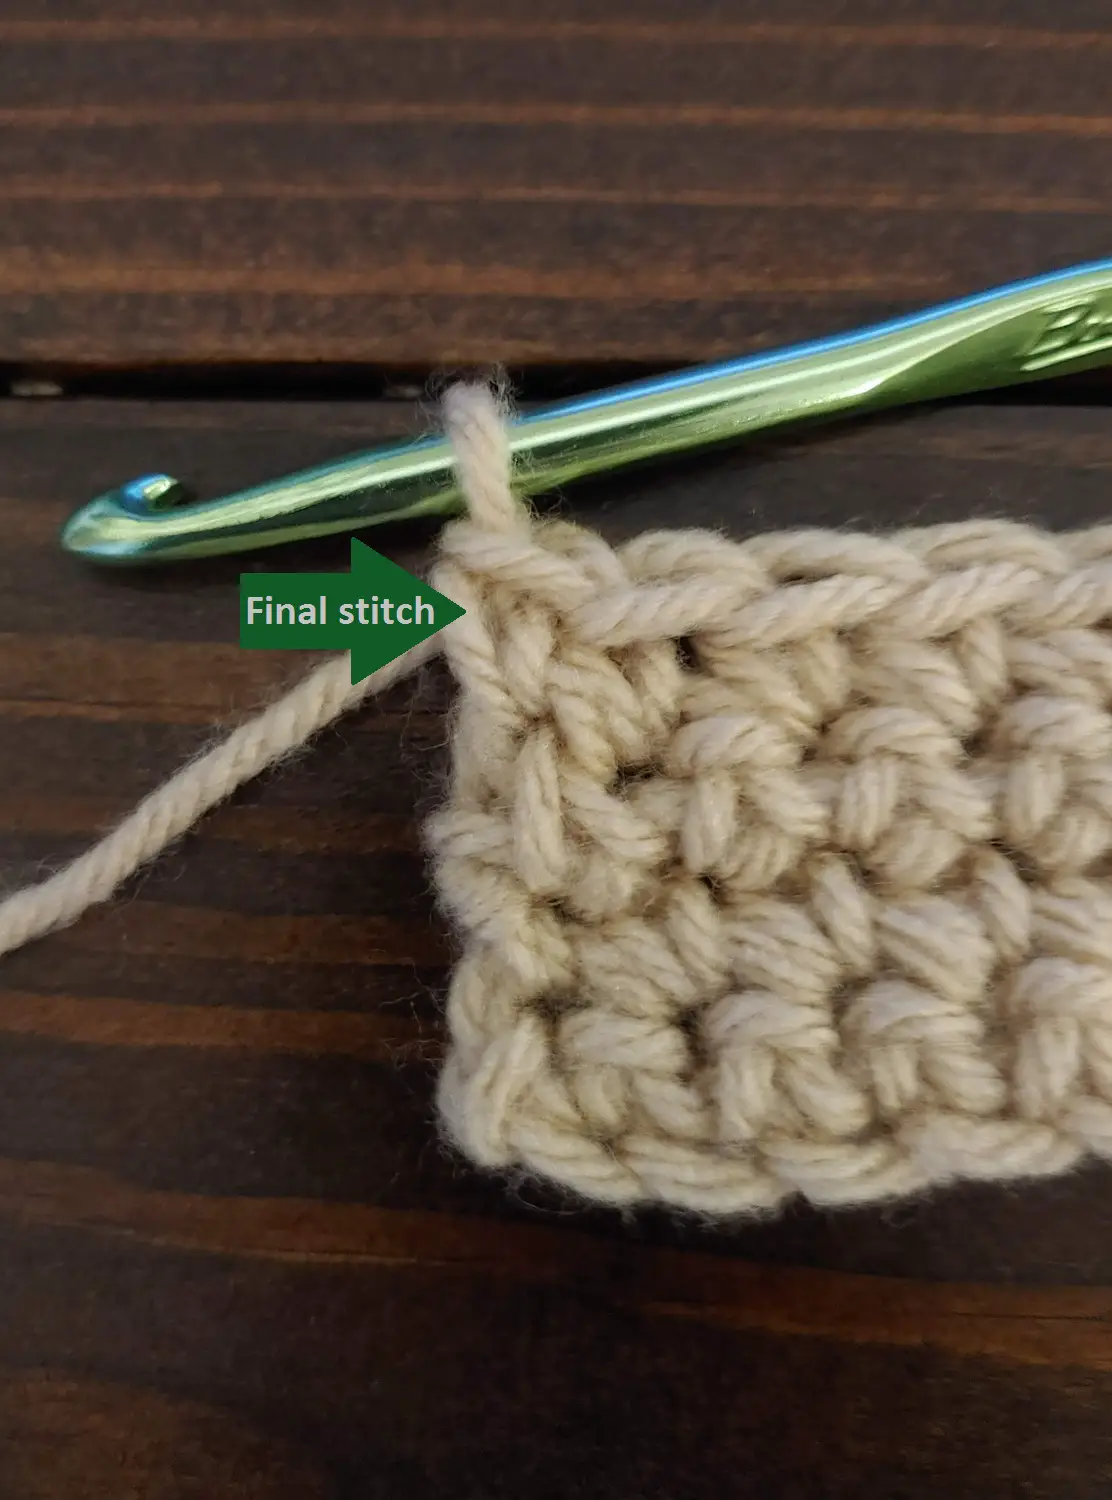
- Crochet your final stitch
You do this in the same place as your final stitch for any other row (either in the turning chain, in your first stitch of the previous row, or in your “fake” stitch.) Do not chain/turn your work.
- Cut your yarn
Cut your working yarn 5-6 inches away from your final stitch. This is called the “tail.”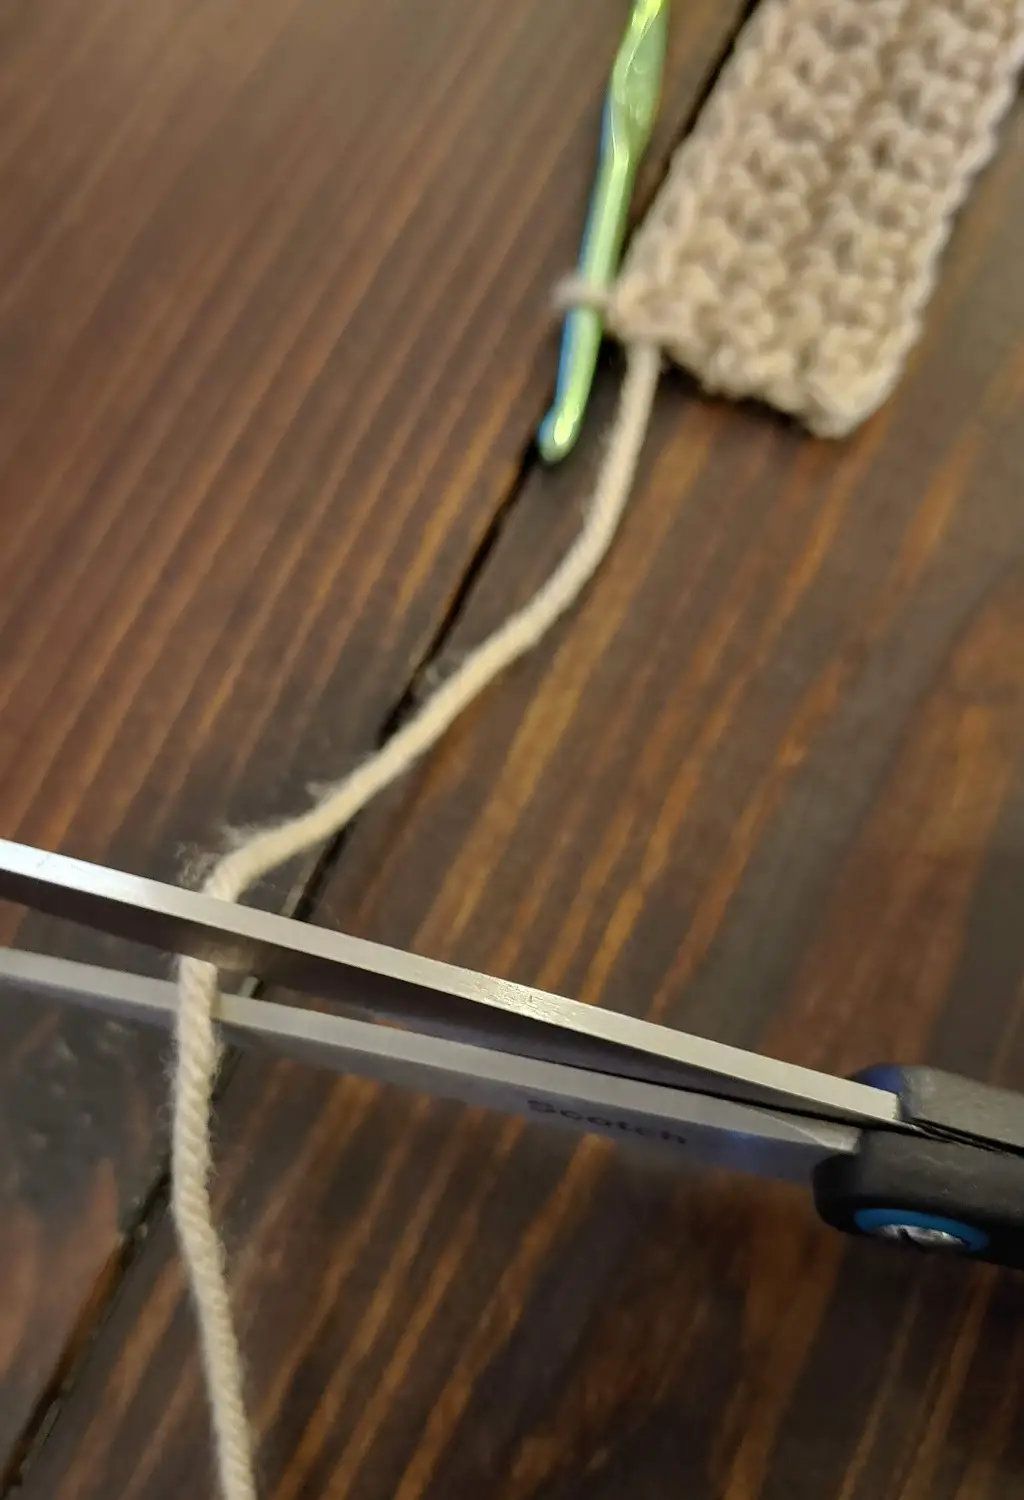
- Chain one
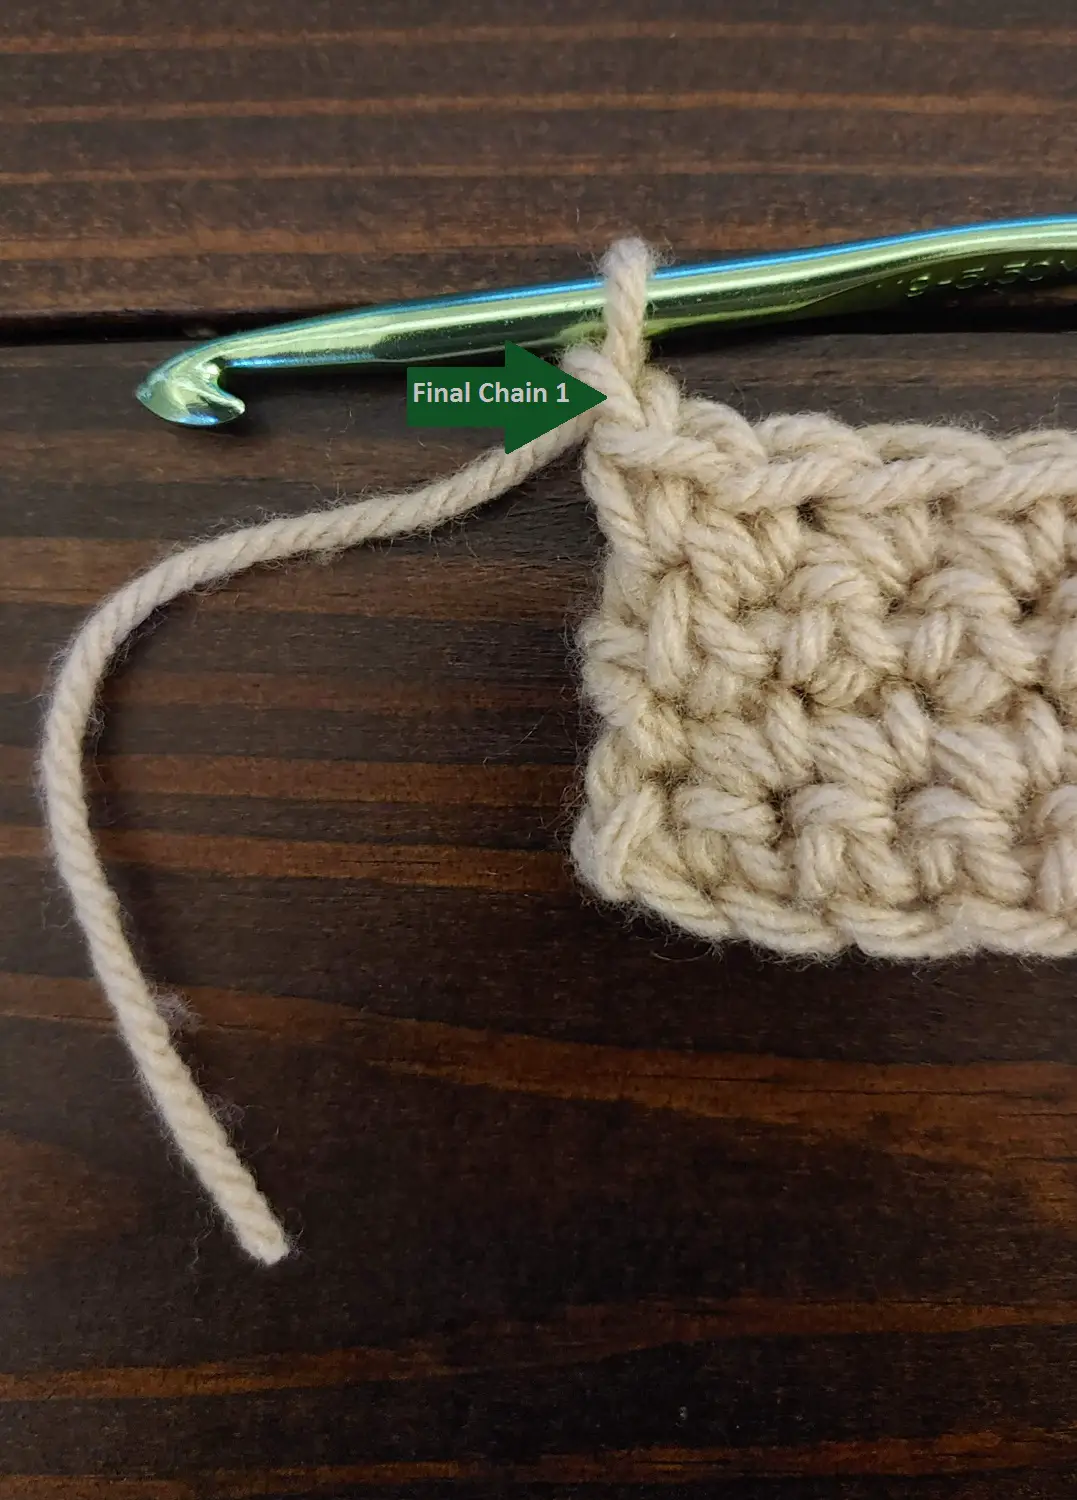
- Pull the yarn all the way through to make a knot.
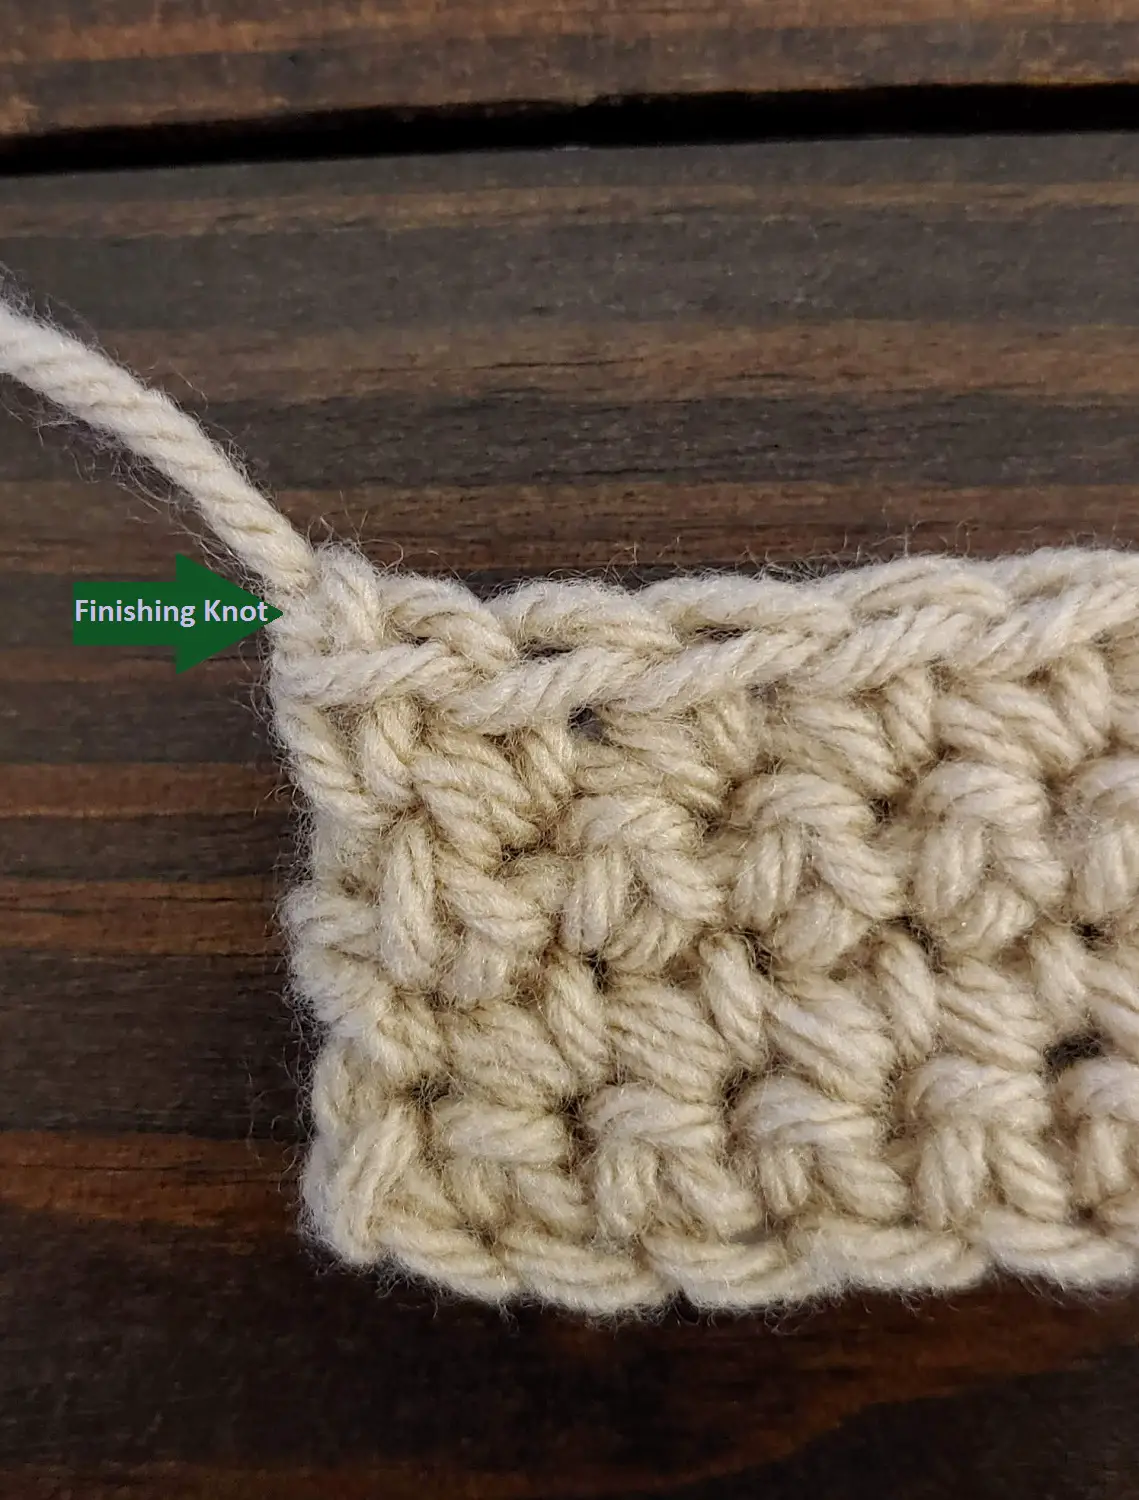
Instead of leaving the loop on your hook, you will put the yarn all the way through the stitch, tightening the knot to ensure that it is close to your final stitch so it will not be visible or allow the stitch to become loose.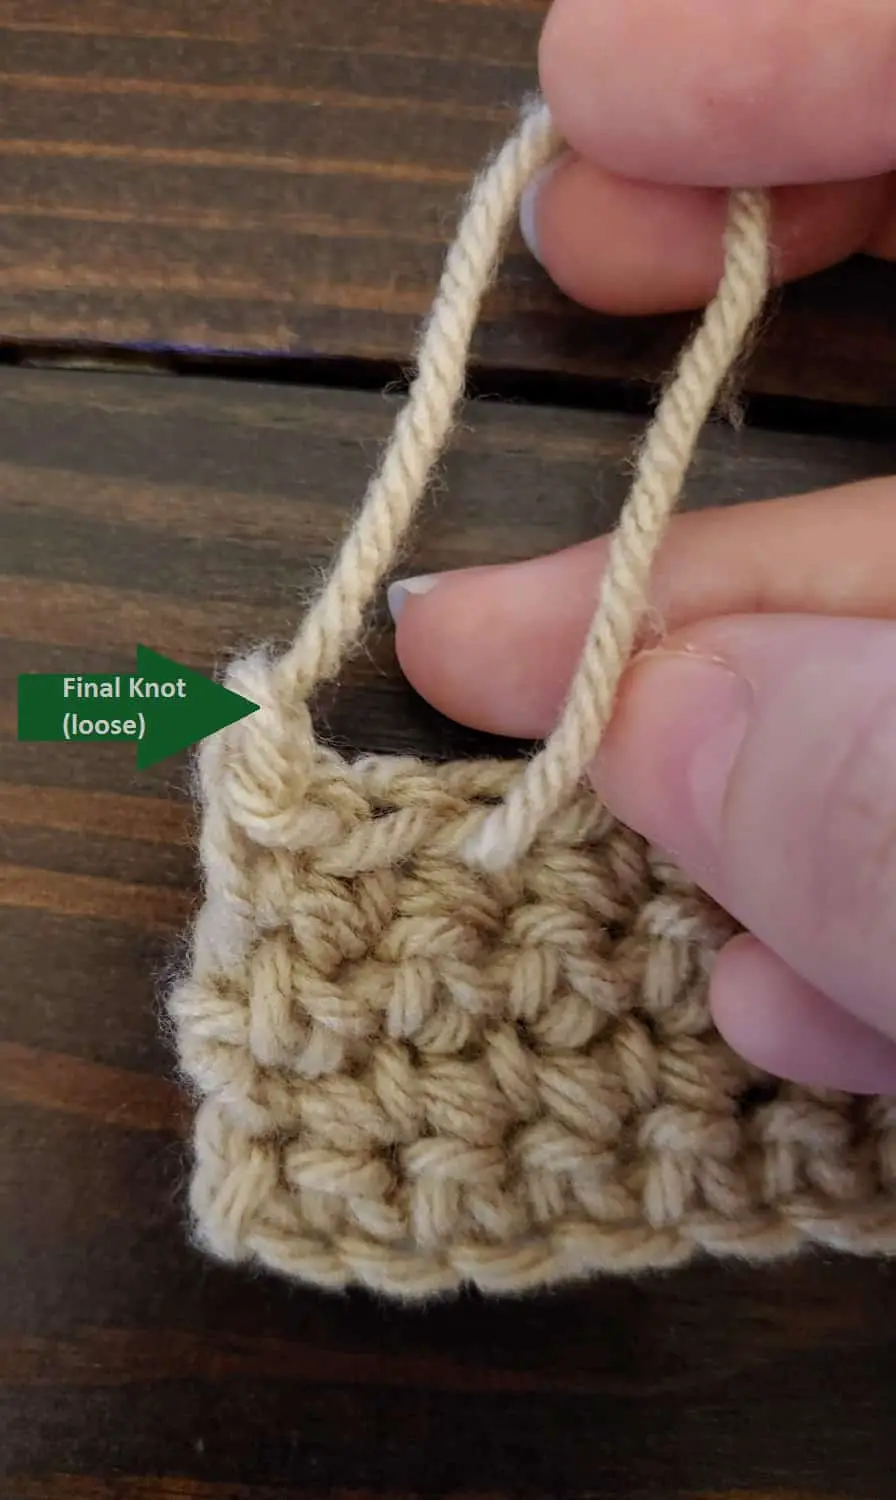
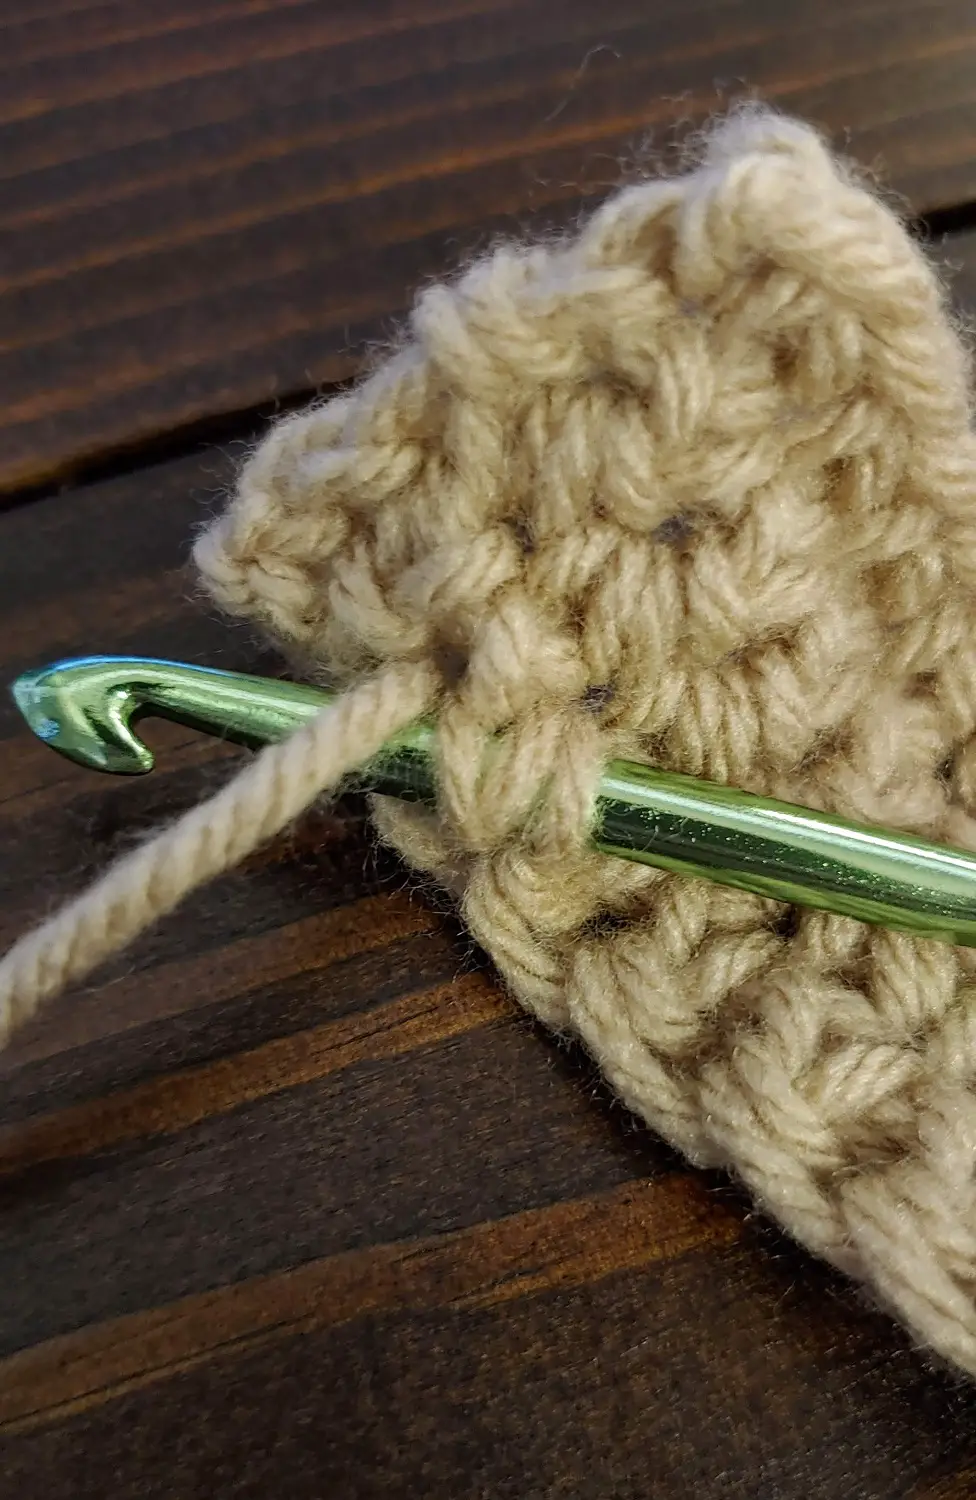
- Weave in the ends/tails.
You can choose to use your crochet hook or a darning (yarn) needle to weave in the ends.- If you use a hook, place your hook through a loop, catch the yarn, and pull through. You will need to do this many times to work in enough of the yarn to secure the finish.
- If you use a darning needle, thread the needle with the tail and weave the needle in and out of loops.
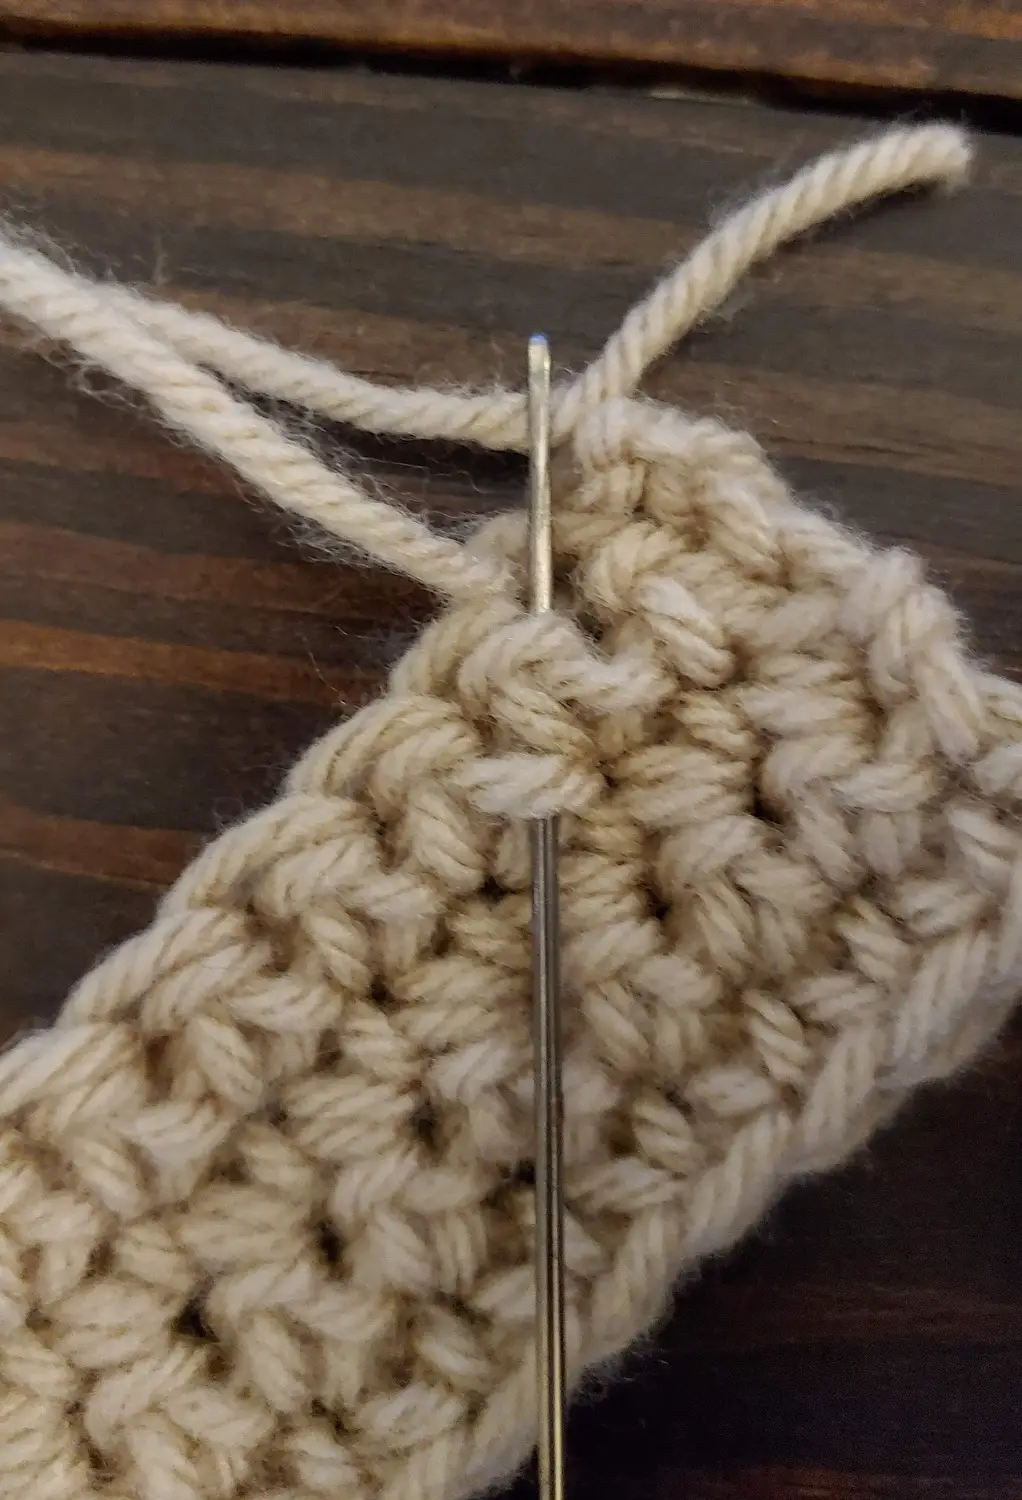
- The precise placement of the “weaving” in is not really important, though some people will say there is a right and wrong way.
- *Note that I prefer to use a darning needle because it is way faster for me. I used the hook method for approx 20 years before I discovered the darning needle method. I will NOT be going back.
- If you use a hook, place your hook through a loop, catch the yarn, and pull through. You will need to do this many times to work in enough of the yarn to secure the finish.
- Trim the end of your tail.
After you have weaved in as much of your tail as you can, trim the rest off so none is hanging out of your work.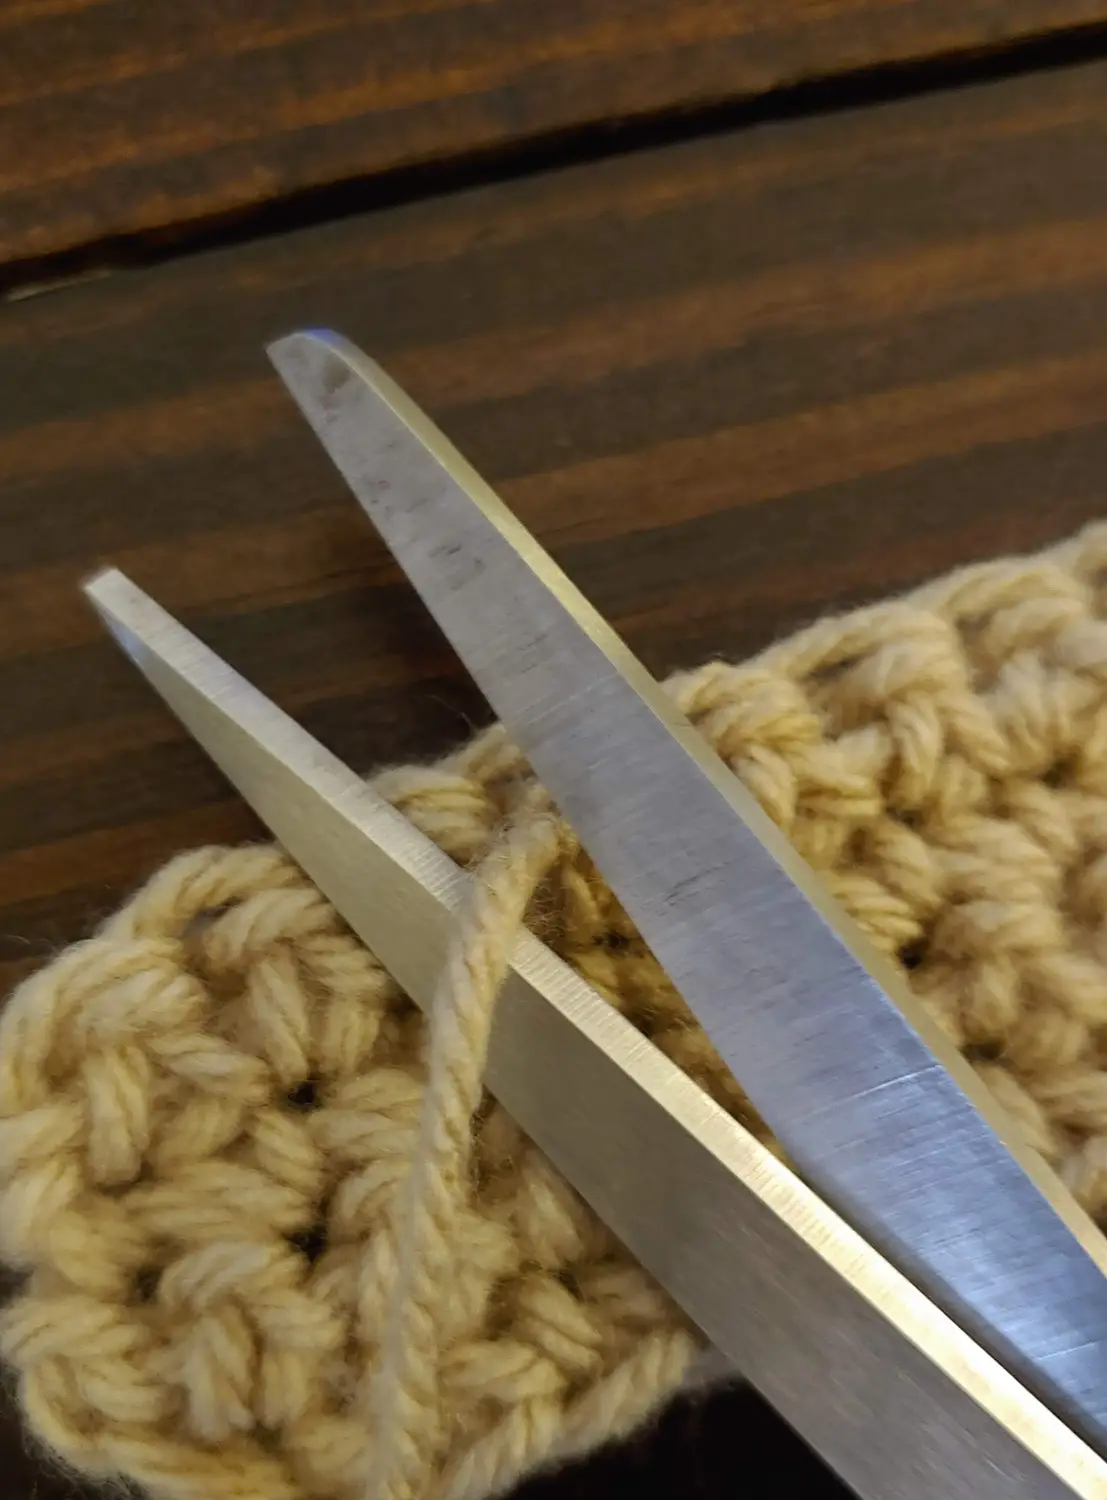
- Now your work is “Finished off.”

Wow! Who knew there were so many variations to starting and ending rows! Well, now you do! I would say most people are taught one way and stick with it because it is familiar or they don’t know of the other ways. I recommend trying out the variations to see if you like something better!
If you think of any other questions about this topic, drop me a comment, and I will answer the best I can!
Now it is time for YOU to get Crafty with Ashy! Let me know which method of turning you prefer, and why, in the comments!
Be sure to subscribe and follow me so you don’t miss any inspiration!