In watercolor painting, you cannot paint light colors over dark colors, which can create a challenge when trying to create a highlight. The general recommendation is to “preserve the white of the paper.” For small or complex shapes, you may need the help of masking fluid.
How do you use masking fluid in watercolor?
- Protect your brush with a thin layer of soap or use a silicone applicator tool
- Dip your brush or tool into the masking fluid and draw or paint the fluid onto your surface where you want to maintain highlights or white space
- Leave to dry until “tacky” to the touch; 10-20 minutes (based on brand formulation)
- Paint around and over the masking fluid until ready to address the white spaces or reveal highlights
- Remove masking fluid with a rubber eraser or your freshly washed fingers
Now that we know the basic steps for using masking fluid let’s explore some additional information, tips, and tricks!
What is masking fluid?
Masking fluid, liquid frisket, or drawing gum are all specially formulated liquid latex used in watercolor painting to preserve white or lighter areas of the paper. After application, the fluid dries, allowing you to paint over it without affecting the area of paper under the fluid. After the paint dries, the masking fluid can be removed to reveal the highlight beneath.
Masking fluid provides a temporary barrier on the paper’s surface, preventing watercolor paint from staining the masked areas. It is applied by painting, drawing, or splattering to watercolor paper to preserve the white of the unpainted paper or applied on top of washes of color to preserve lighter colors in the finished artwork. It is very helpful when preserving small areas or complex shapes that would be hard to paint around.
For example, if you are painting a landscape with some bright flowers in a field, it would be tough to create a smooth, even wash for the grass while painting around a bunch of tiny flower shapes. Applying masking fluid where the flowers will later be painted is ideal. The flowers can stay white, or you can paint them any color you want after you remove the masking fluid.
Masking fluids are typically made with liquid latex, water, and ammonia. The ammonia stabilizes the mixture and ensures that it remains fluid and well-emulsified, helping prevent clumping.
Schmincke has created a masking fluid that does not contain ammonia but a synthetic emulsifier. So, if you are concerned about the ammonia content or odor, try out Schmincke’s liquid frisket. (I would post an Amazon link, but it is way cheaper at other art stores like Jackson’s, Cheap Joe’s, and Blicks.)
What is the Best Masking Fluid for Watercolor
Schmincke’s White Liquid Frisket is the top-performing masking fluid. It is least likely to damage your paper or lift pigment. It is easy to remove from the paper. It has a pleasant smell, whereas most masking fluids smell faintly of ammonia.
Five Steps For Using Masking Fluid For Watercolor
Let’s get back to those five steps for using masking fluid in your watercolor art.
First, a disclaimer: It is always recommended to test your brand of masking fluid on your choice of paper before using it for a painting. This will help you learn how to apply it evenly, how to best remove it, and how your paper withstands the stress of removal. Some papers are more fragile than others, and some masking fluids bond more strongly than others.
Protect your brush from masking fluid with a thin layer of soap or use a silicone applicator tool
Masking fluid dries very quickly and can ruin your brushes. Do not use one of your expensive brushes to apply masking fluid! Use an older, cheaper, craft-type brush. The solution is sticky and thick enough to help the brush maintain a point.
How do you use masking fluid without ruining brushes?
To protect your brush, roll it on a bar of soap or in a drop of dish soap. This creates a thin barrier between the bristles and the masking fluid and makes cleaning the brush much easier.
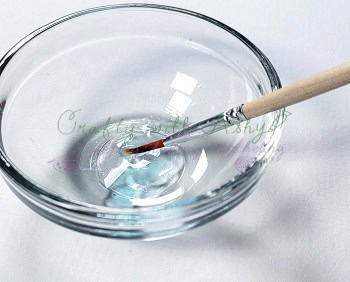
After applying masking fluid to your paper, clean your brush with mild soap and water immediately. If the masking fluid dries in the bristles, it will be nearly impossible to remove without damaging the brush.
Another option is to use a different tool to apply the masking fluid. You can use a Q-tip, a skewer or stick, a ruling pen, or a silicone “brush.” These will all be much easier to clean or are disposable.
What is the best applicator for masking fluid?
The best option for applying masking fluid to a watercolor painting is an older paintbrush that has already lost its sharp point or an inexpensive “craft” paintbrush. For thin, controlled lines, a ruling pen is another excellent option.
Full disclosure. I use an inexpensive paintbrush and have not had an issue with clean-up because I use the soap trick and wash the brush immediately after application. You have to wait for the masking fluid to dry before moving on with your painting anyway, so you have time to wash up.
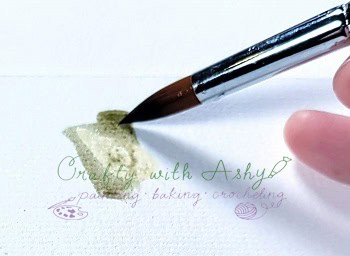
Dip your brush or tool into the masking fluid and draw or paint the fluid onto your surface where you want to maintain highlights or white space
Do not shake the bottle of masking fluid. This will create bubbles and will result in uneven application of the fluid. If it is separated, gently roll the bottle around. In theory, it should not separate much. If your fluid feels too thick to apply, you can stir in a few drops of water.
Open the bottle of masking fluid and dip your applicator tool into it. Alternatively, you can pour a small amount into a dish and work from there. The benefit of using a different dish is that you can close the bottle faster and help prevent the fluid from drying out.
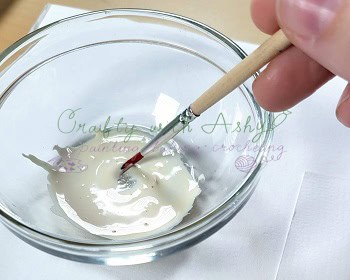
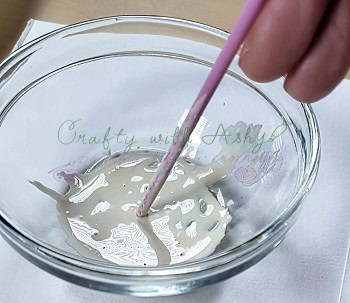
Use your tool to paint or draw the fluid onto your watercolor paper in the areas you want to preserve whiteness. You should apply it thinly while ensuring complete coverage. If you have gaps in the application, you will have unwanted areas of color in your white spaces. If you apply too thickly, it will take forever to dry and will likely adhere more firmly to the paper, which may cause it to rip.
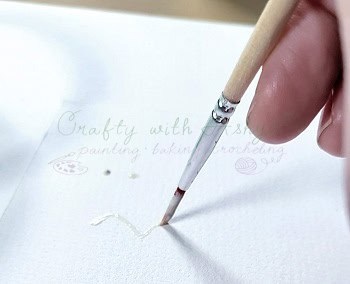
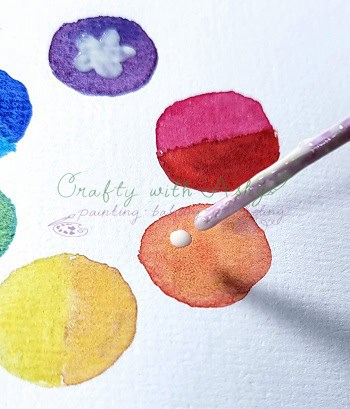
When you mask over a lighter color wash instead of white paper, the paper must be completely dry before applying. If you apply masking fluid to wet or even damp paper, the paper will rip when attempting removal. Also, most of the time, masking fluid will lift some of the pigment from the paper. The amount of lifting will depend on the watercolor paper you are using. (Repeat disclaimer: test your combination of paper, masking fluid, and paints before trying for a completed piece!)
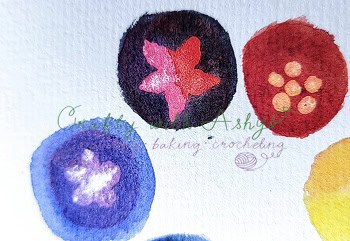
Leave the masking fluid to dry until “tacky” to the touch
Masking fluid drying time is generally between 15 and 20 minutes. Some brands dry much faster, and others may take up to 45 minutes.
The dry time of the masking fluid will also depend on the thickness of your application. A very thin application will dry much quicker than a thick, globby application. This is one reason to ensure a thin, even coat.
How long do you leave masking fluid on before painting?
You should leave masking fluid until it is COMPLETELY dry before painting, which is dependent on the brand and thickness of your application, but should be under 45 minutes. You should not leave masking fluid on for longer than 48 hours.
Is masking fluid sticky when wet or dry?
Masking fluid is liquidy when wet; once dry, it will feel slightly tacky and rubbery.
You can test the masking fluid by touching it very lightly. Be careful not to disturb it too much; if it is still wet, you do not want to move it around or lift it, which would create a space for paint to seep between the masked area.
Many masking fluids will change color slightly when dried, but not all.
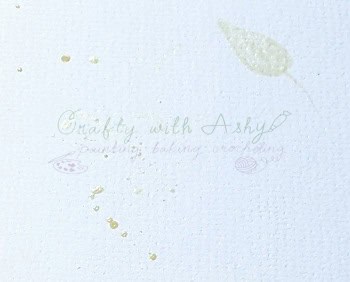
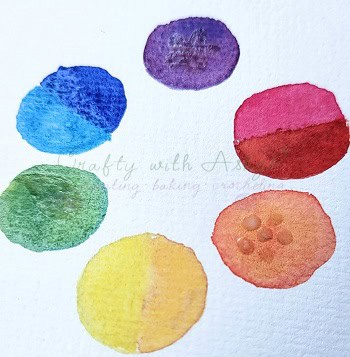
Paint around and over the masking fluid until you ready to address the white spaces or reveal highlights
The entire purpose of masking fluid is to maintain white space or highlights without having to paint around them. You can just paint right over the dried masking fluid. (If it is wet, it will make a giant mess.)
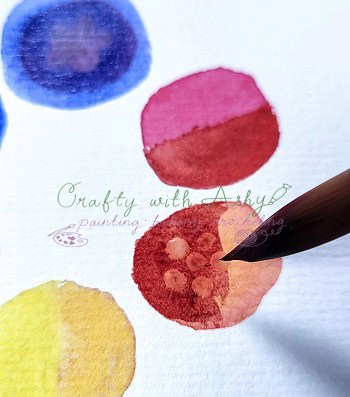
You can paint large, even washes without having to slow down to fiddle with those small spaces, risking unwanted runbacks or cauliflowers due to uneven drying time or application. This is great for painting things like the sun reflecting off water.
You can also paint tiny areas without having to be as careful or precise. In this case, the precision would be in applying the masking fluid. One example would be painting a white-framed window.
The examples are endless, but any time you want to paint over instead of around something, you could use masking fluid.
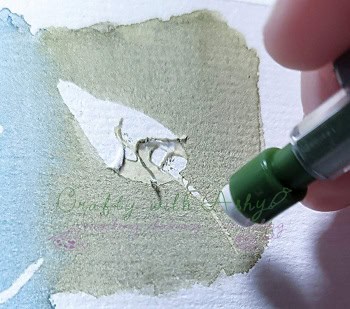
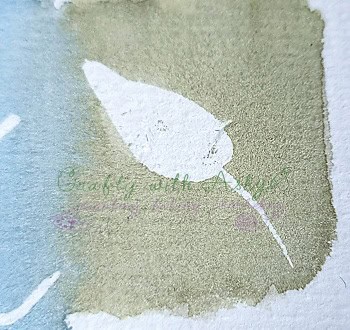
Remove masking fluid with a rubber eraser or your freshly washed fingers
Masking fluid removal is a delicate process. You don’t want to aggressively rub it to remove it because you will likely rip the paper. It should also be removed within 48 hours of initial application to prevent paper damage.
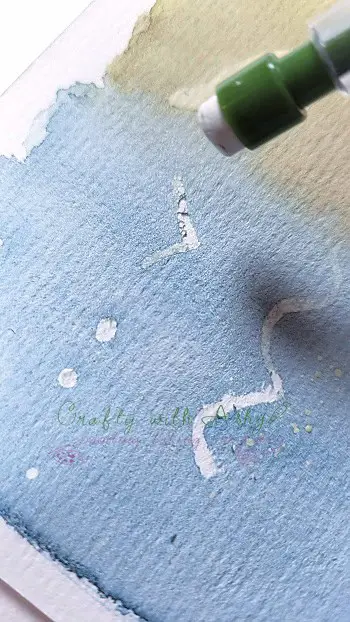
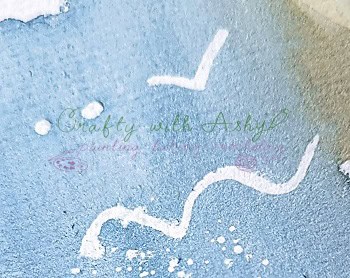
To remove it, gently rub it with a rubber cement pickup, a clean rubber eraser, or your fingers. If you use your fingers, you should wash your hands first to remove excess oil. A rubber cement pickup will be the least damaging to your paper, but I have used a clean mechanical pencil eraser to remove small areas of masking fluid with great success! Again, this will change based on your paper; masking fluid removal from hot press (smooth) paper is much easier than cold press (textured) paper.

On Hot Pressed Baohong Paper

On Hot Pressed Baohong Paper
Some people like to start rubbing at one end to lift it and then peel the masking fluid away. This does work, but it also increases the risk of tearing the paper; if you want to use this faster approach, make sure you still go slow and test it on your paper of choice before you paint an entire masterpiece!
What are the drawbacks of using masking fluid in watercolor paintings?
Masking fluid is a widely used tool for watercolor artists, but there are some drawbacks and challenges with its use.
- Potential brush damage: If masking fluid dries in the bristles of your brush, it is impossible to remove. If you tend to have difficulty cleaning up right away, you should probably avoid using masking fluid with a brush. This can be alleviated by protecting the bristles with a thin layer of mild soap and cleaning the brush immediately after use.
- Difficulty in application: Applying masking fluid requires precision and care to achieve the desired results. First, it takes a lot of planning. If you want to use a very loose and spontaneous painting approach, masking fluid is likely not for you (unless splattering randomly is in the cards!). Due to the slight thickness of the solution, it can be challenging to apply masking fluid evenly and smoothly, especially when creating intricate details or fine lines.
- Risk of damaging paper: Masking fluid used incorrectly (such as using heat to dry it) or removed too aggressively can damage or tear the watercolor paper. Some papers just don’t hold up to masking fluid, regardless of the techniques used.
- Risk of lifting pigment: When applied over previous watercolor washes, most masking fluid and watercolor paper combinations result in minimal to moderate lifting of the pigment when the masking fluid is removed.
- Potential for staining: Some masking fluids may leave a slight residue or stain on the paper after removal. While this should be mitigated by using high-quality masking fluids, it is still a consideration for artists. I always recommend that you test your supplies on scratch paper of the same brand before use.
- Drying Time: Masking fluid requires time to dry completely before painting over it. This drying time varies, but you must wait before proceeding with your painting, which can affect workflow and productivity.
- Limits time to complete painting: It is recommended that masking fluid be removed within 48 hours of application to prevent paper damage upon removal. This can pose a challenge because many people work on paintings for days to weeks (let’s be honest, sometimes months) until inspiration is reignited. If you use masking fluid, you have to commit to finishing that painting within the 48-hour time limit.
What can I use instead of masking fluid to preserve highlights in watercolor paintings?
Masking fluid use in watercolor painting is mildly controversial. If you want alternatives to masking fluid, there are several techniques you can utilize to maintain highlights or white space in your paintings.
- Wax or Crayons:
- You can draw with wax or wax-based crayons to create a permanent resist effect on watercolor paper. Simply draw or color over the areas you want to preserve before painting. The wax will resist the paint, preventing staining of the paper. Using wax typically results in a more natural, softer edge to your highlight area, but it is permanent, so test the effect first to ensure it is what you want.
- Masking Tape:
- Masking tape can be applied to the paper to create clean edges and preserve areas from paint. Ensure the tape is adhered fully, then paint over it without much worry. Carefully remove the tape once the paint is dry to reveal the preserved areas. You can heat the tape minimally to make it easier to remove and less likely to tear the paper. Masking tape will create clean, hard edges.
- White mediums:
- White gel pens, soft pastels, or opaque pigments (like gouache, acrylic, or bleed-proof white) can create highlights or fine details in a watercolor painting. In this approach, the white or highlighted areas don’t require preservation, you can add them back in at the end of the painting process.
- Salt or Alcohol:
- Sprinkling salt or spraying alcohol onto wet watercolor paint can create interesting textures and patterns, causing the paint to repel or disperse. While not a substitute for all masking fluid applications, these techniques can offer a spattered effect.
- Bleach:
- Using bleach to effectively erase pigment after application is an alternative to masking fluid. Bleach can be dropped onto the painting or applied with a brush. The bleach can be left until the pigment disappears to white, or it can be blotted off to reveal a lighter pigment. You can use a “magic eraser” sponge to achieve a similar result.
- Negative Painting:
- Instead of masking specific areas, you can paint around those areas of highlight. This is called negative painting. It can be difficult or finicky to paint around all areas of highlight, but it is a highly valued technique.
Now that you know a ton about masking fluid, I recommend trying it. Let me know if you have any additional questions about the topic!
Now it is time for YOU to get Crafty with Ashy!
Be sure to subscribe and follow me so you don’t miss any inspiration!

