There are a lot of “holes” in crochet stitches. Because of this, it can sometimes be hard to know where to insert your hook to put the next stitch. Knowing where to insert your hook is vital knowledge to have for EVERY crochet project you complete!
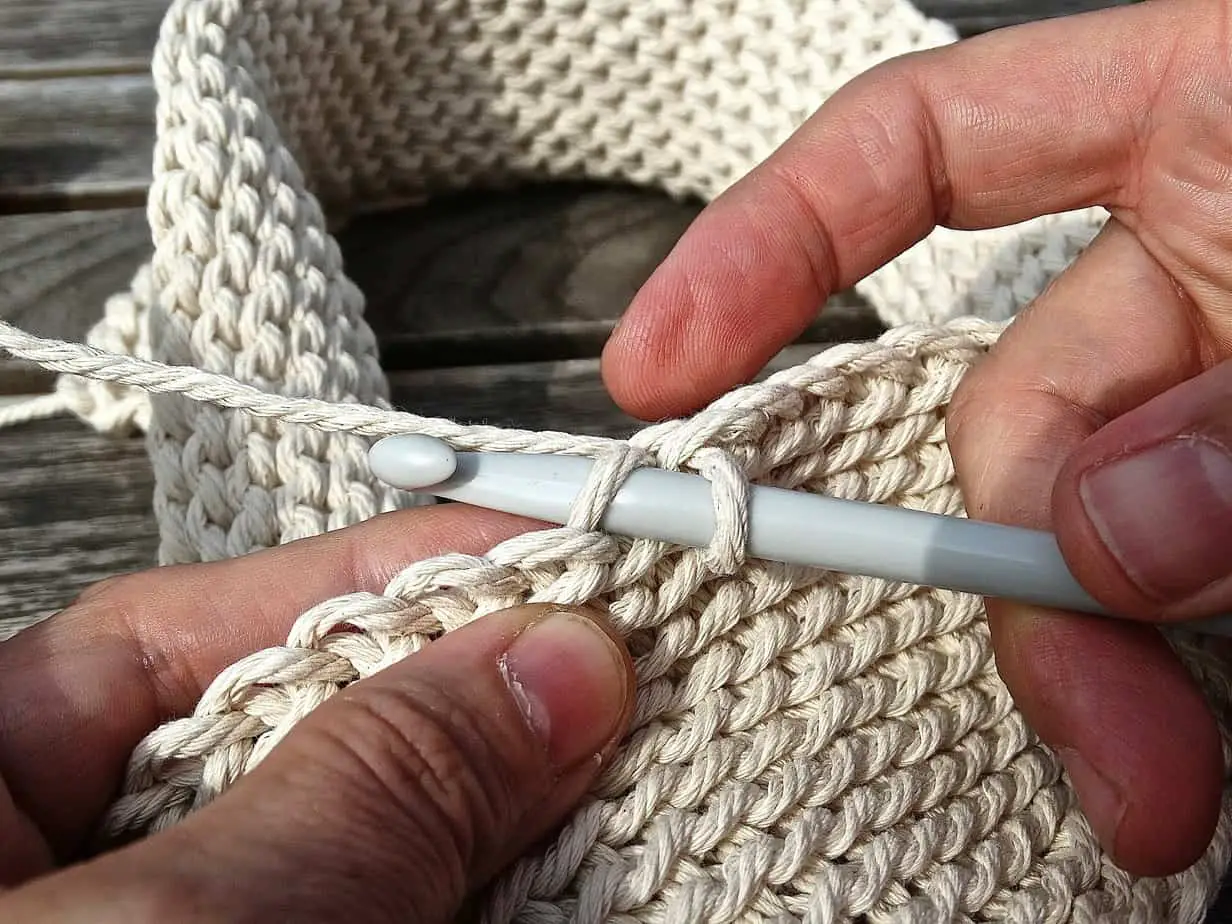
So, where do I put my hook? When you are working one of the basic crochet stitches (single, half-double, double, treble), you will insert your hook under the two loops that look like a “V” on top of the stitch.
So that is the basic answer to the question, but what if you are working another type of stitch? What if the pattern says something funny like “work in the front loop?” Continue reading for more details on where to insert your hook, including many variations you may see in a pattern!
Where to Insert Your Crochet Hook-The Standard Placement
Working Into the Foundation Chain
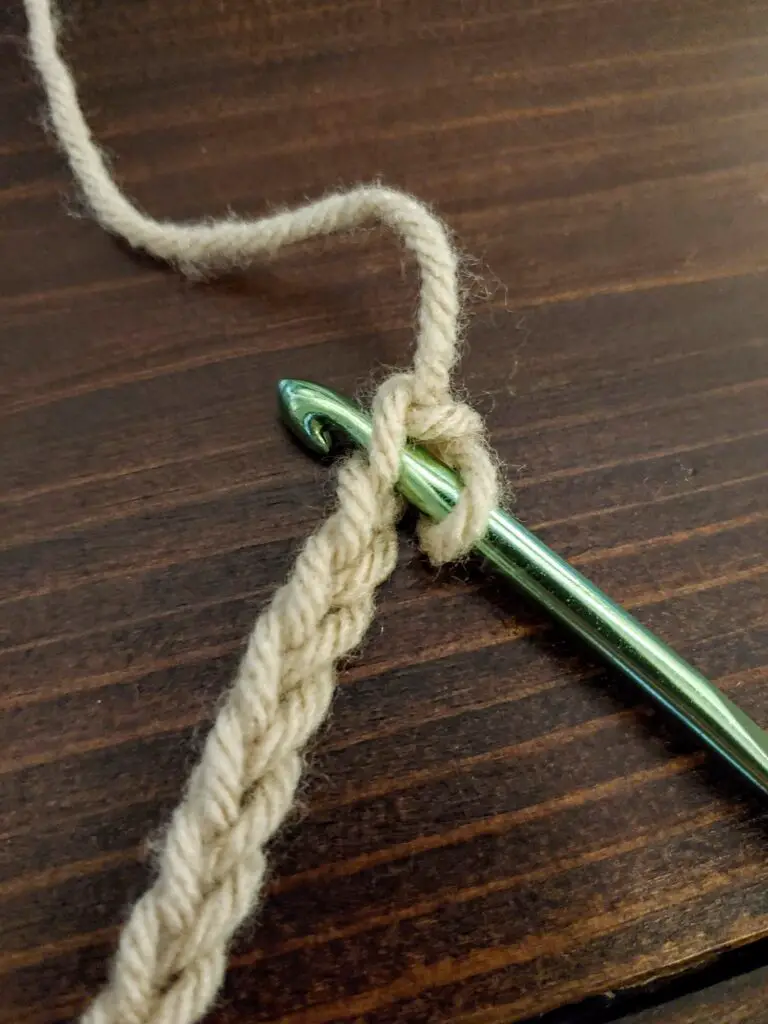
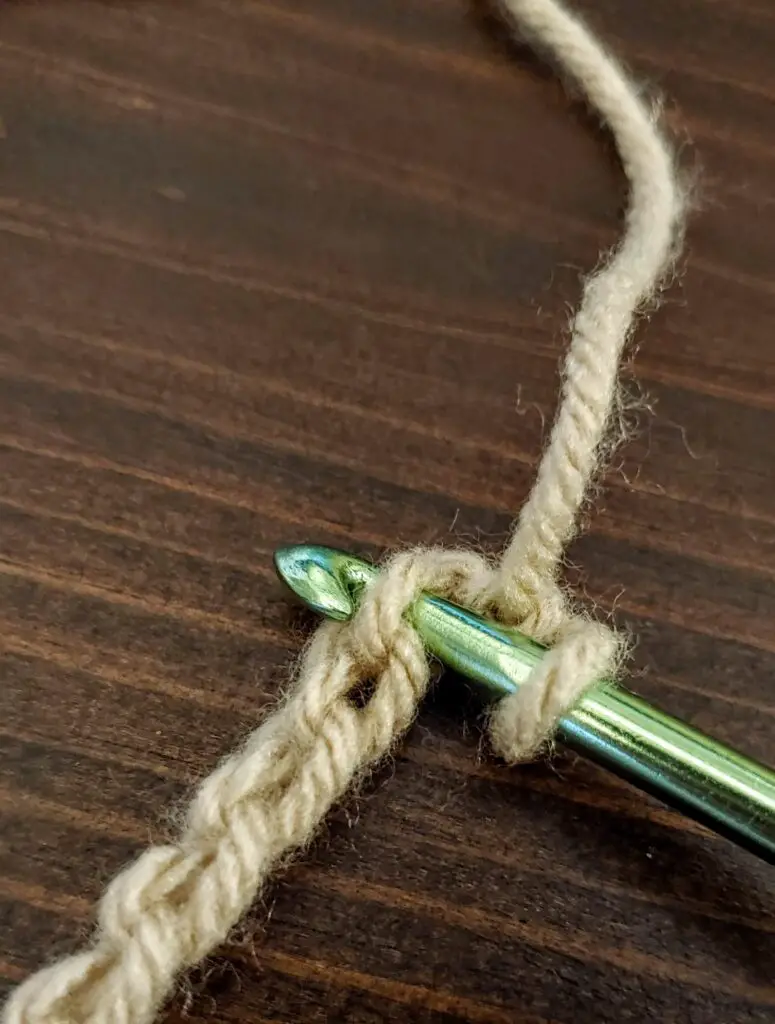
First things first, you will most likely be starting with a foundation chain row. Working stitches back into the foundation chain row is different from working into a previous row of the basic crochet stitches.
There are actually 4 main variations for hook placement into the foundation chain. None is actually considered “right,” but the first is the “standard” technique. I’m going to go over them all here, though, because you can really choose any of them.
Inserting the hook under both the top and back loops
Like I said above, I would consider this the “standard” method that is taught. It results in the bottom of your finished project having a single loop showing.

Inserting the hook under just the top loop
This is probably the second most common way, but that is a guess. This is also touted as the “easiest” loop to work into. It is the easiest to see, that is for sure, but the easiest to work into would vary from person to person. This method will give you two loops at the bottom of your work.
Inserting the hook under only the back loop
This is the method that I prefer. Contrary to what many people say about this method, I find it easier to be consistent with, but you can totally feel differently! To each his own! I also like the look of it because you can see the “V” shape at the bottom of your work, which matches what the last row of your project will look like.
Inserting the hook under both the bottom and top loops (through the V)
This is a super rare method that seems difficult to me. But again, to each his own! Technically, with this method, you are going into the same space as working in the back loop, but you are going in a different direction. This will result in a single loop at the bottom of your work.
For more information about working into the foundation chain, check out my previous post about starting the “2nd row” of crochet, actually called Row 1.
Working Into an Existing Row of Stitches
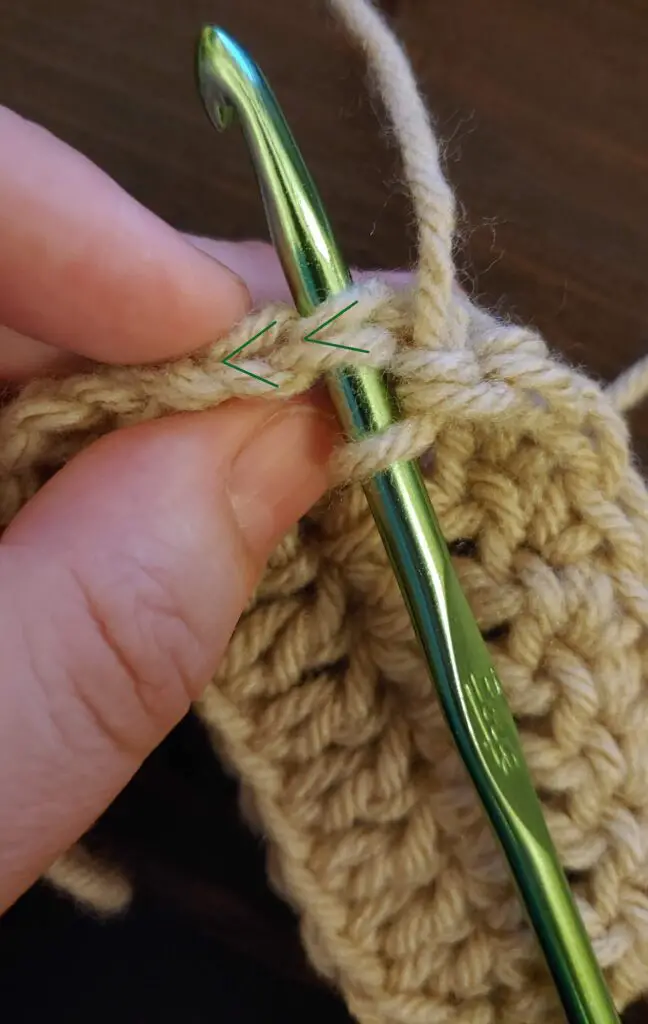
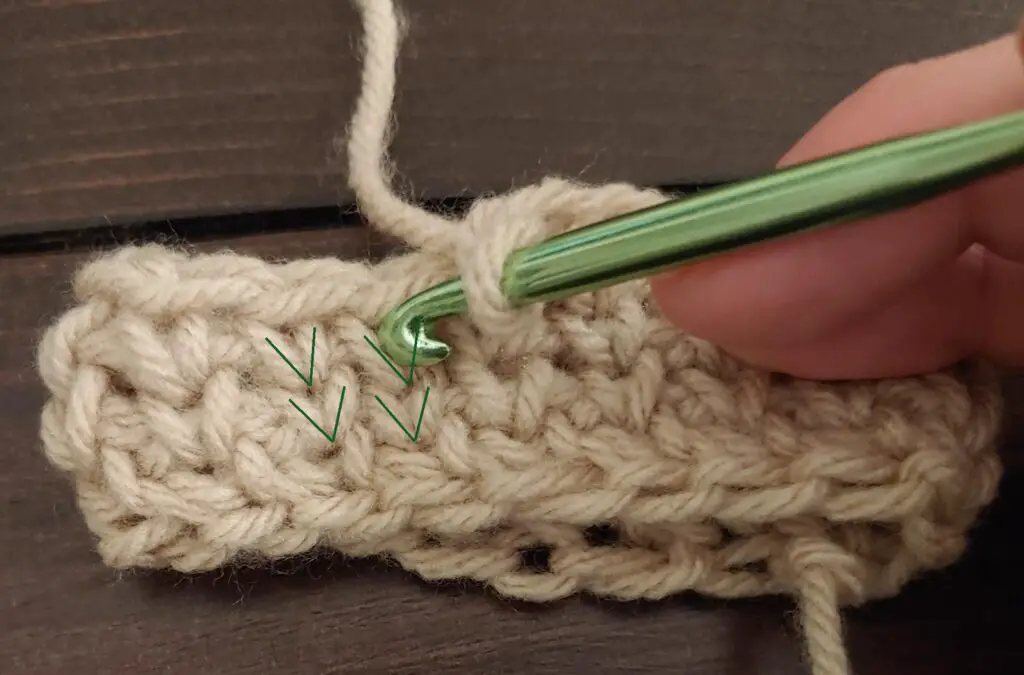
When working any of the basic crochet stitches (single, half-double, double, or treble) you will insert your hook into the “same” place on each of the stitches. At the very top of each stitch, when looking down at it from the top, there is a “V” shape. You will place your hook under both of the loops that create the “V” to work your next stitch.
When working any of the basic crochet stitches (single, half-double, double, or treble) you will insert your hook into the “same” place on each of the stitches. At the very top of each stitch (when looking down at it from the top), there is a “V” shape. You will place your hook under both of the loops that create the “V” to work your next stitch.
Depending on the method you choose for turning, you may have to insert your hook into a chain stitch at the end of the row. (When working a single crochet, you never place a stitch in your turning chain.)
Here, I will provide the explanation for the 2 main variations when working a half-double, double, or treble crochet stitch.
Variation 1: Turning chains count as a stitch
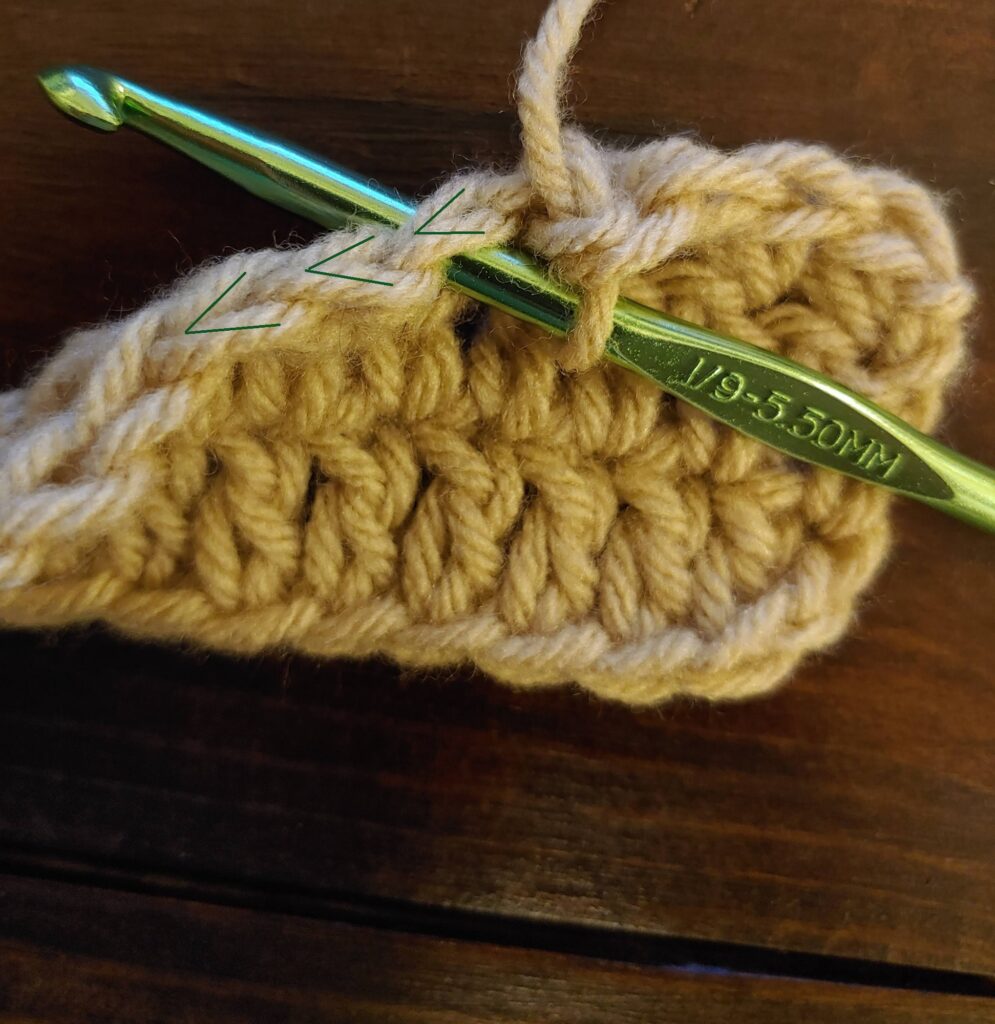
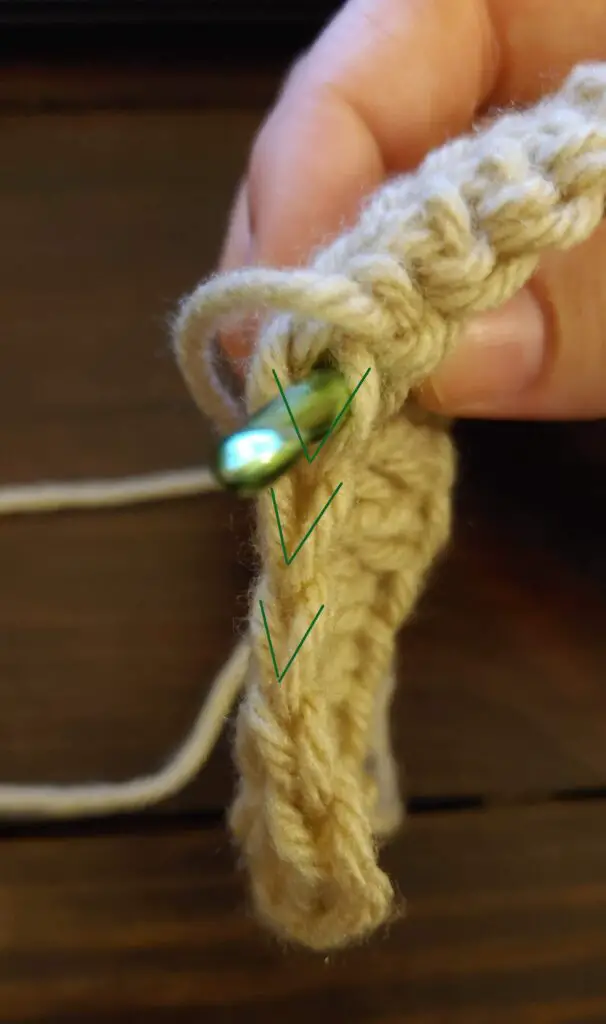
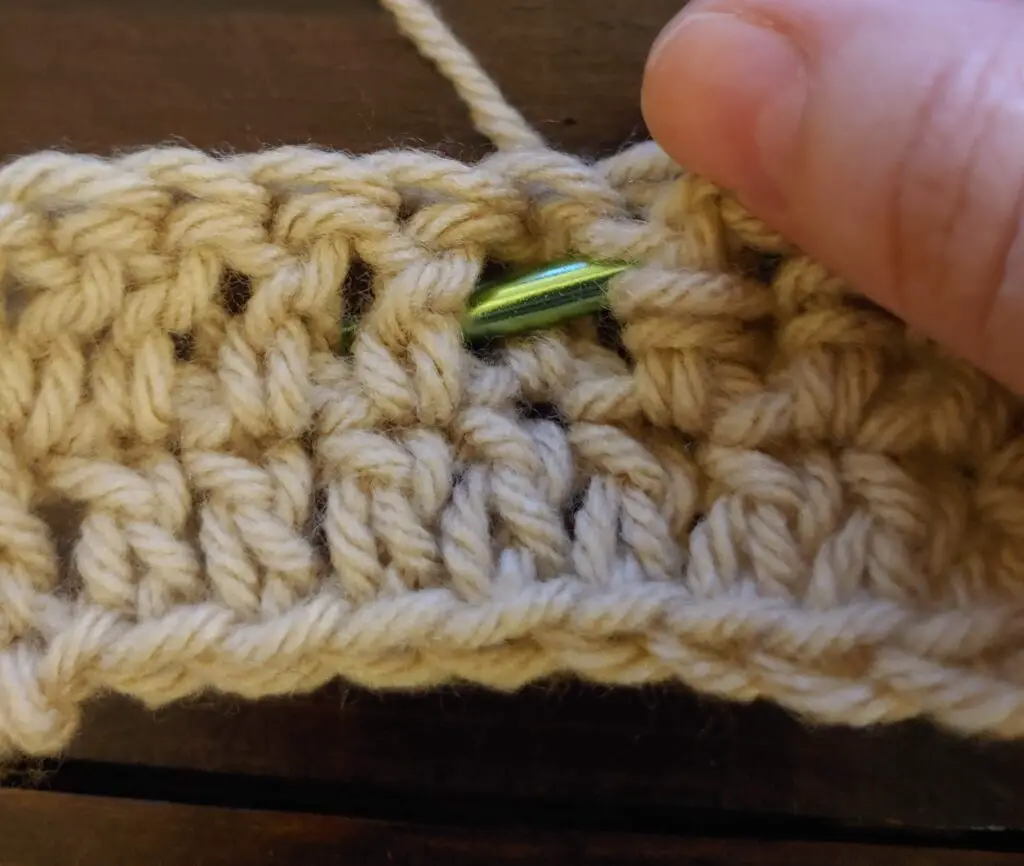
When the turning chains count as a stitch, you will insert your hook into the top chain of the turning chains to work your final stitch of the row. If you refer to the section about working into the foundation chain, you will use the first one, the “standard way,” of inserting the hook under the top loop and the back loop of the chain. It does look a little different than your foundation chain though, so see the picture for reference. If you turn your work sideways, it is easier to see the “V” where you insert your hook.
Variation 2: Turning chains DO NOT count as a stitch
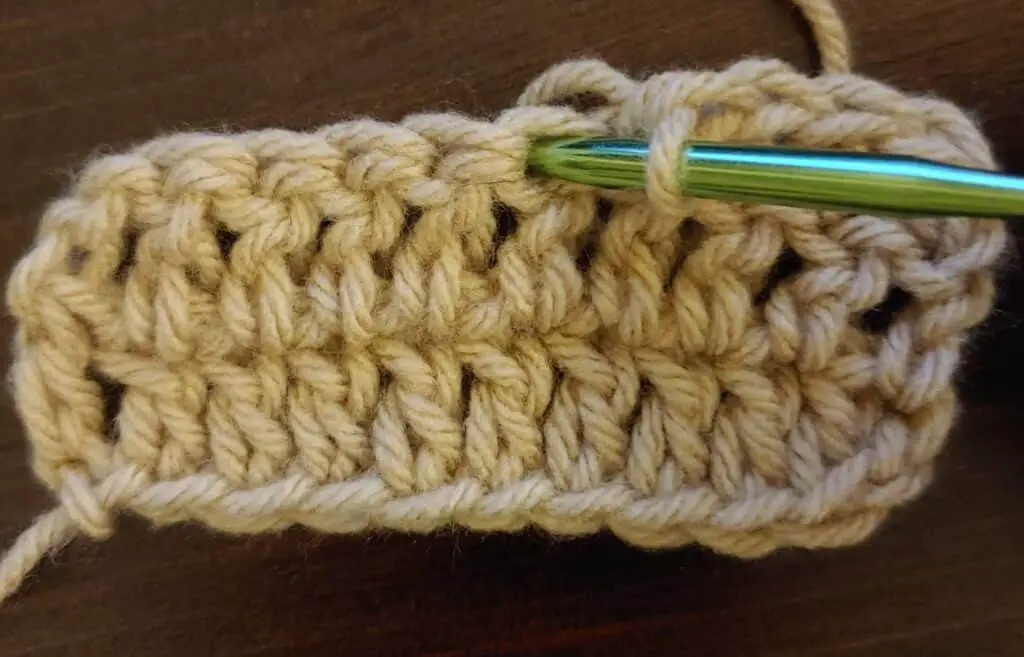
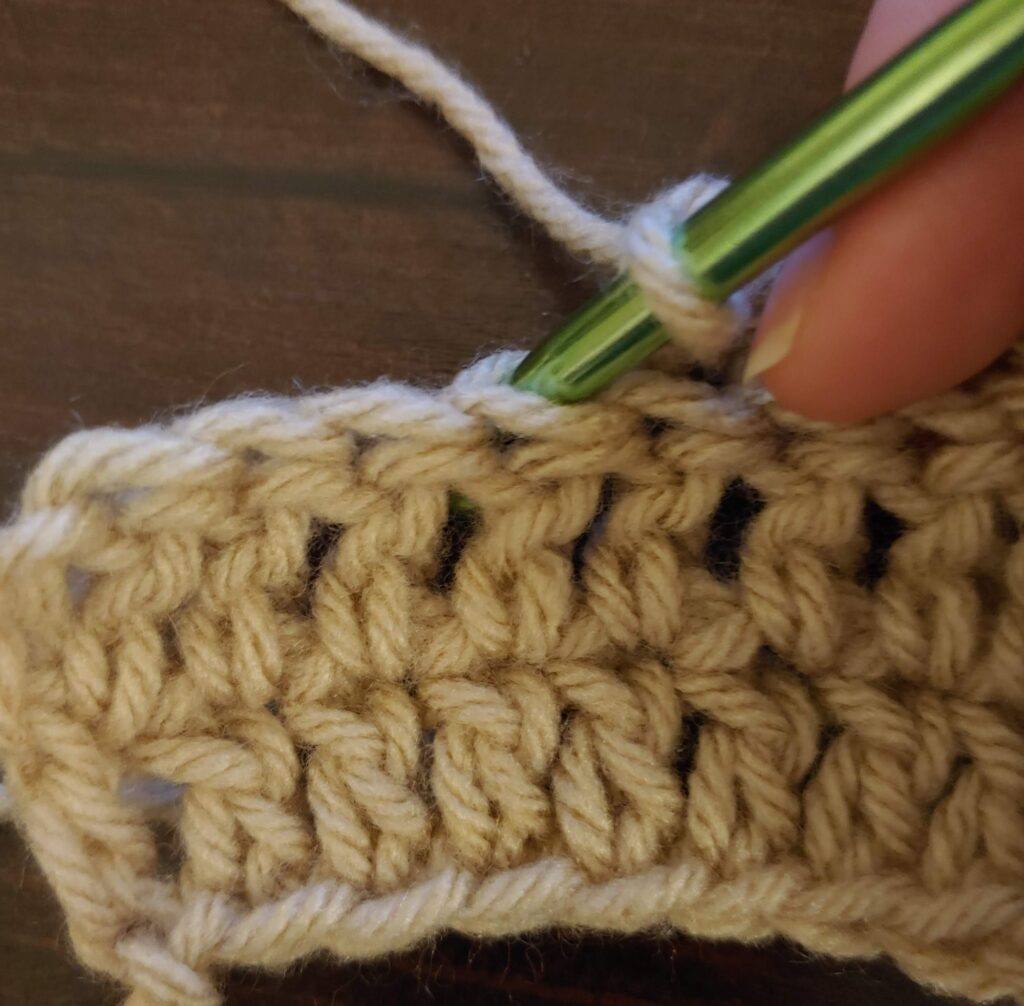
When the turning chains do not count as a stitch, you will insert your hook into the first stitch that you made on the previous row to work your final stitch of the row. You will NOT work a stitch into any of the turning chains at this point.
Where to Insert Your Crochet Hook-When a Variation is Called For (Basic crochet stitches)
Alright, so now we know the basics. But what if your pattern says something like, “Working in the front loop only”? To explain where to insert your hook for these variations, I will need to give you a basic anatomy lesson first….of a crochet stitch, of course! (I am a physical therapist though, so if you need the other kind, let me know!)
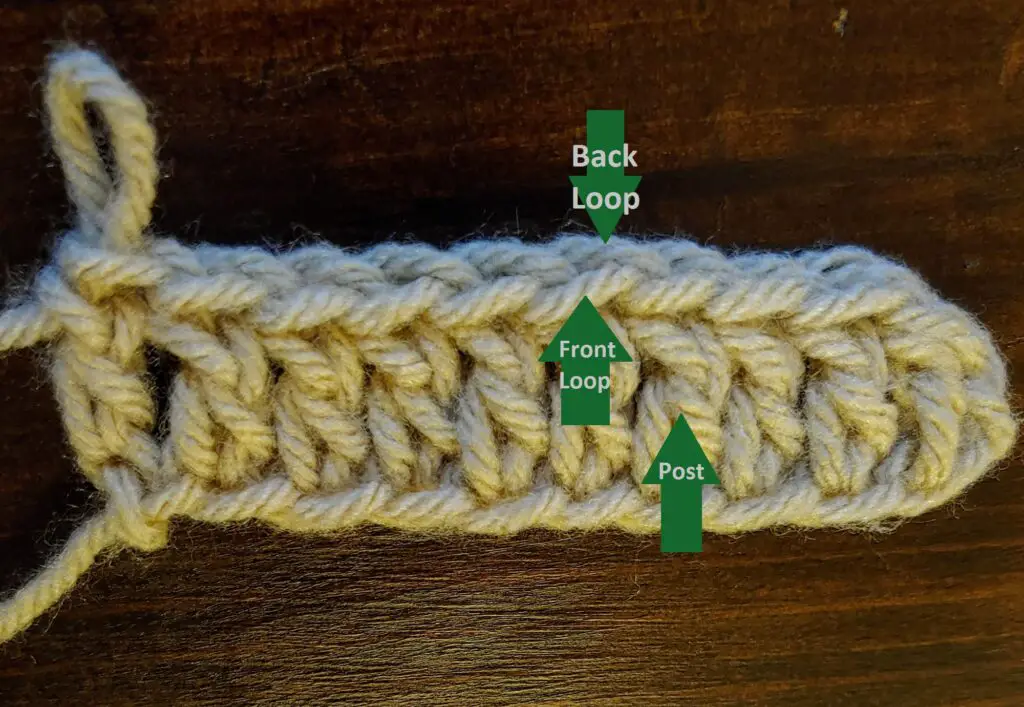
Each of the basic crochet stitches has these pieces of their anatomy all in common (though front and back post stitches RARELY apply to single crochet, it can be done).
So, first, we have the loops. These are the parts of the “V” where you normally insert your hook under both loops at the top of each stitch when looking down at it. The one in front is called the “front loop,” and the one in back is called the “back loop.” (Really creative, I know). The tall part of the stitch is called the “post.”
Alright, so now you know what the parts of the stitch are, you are ready to see how to insert your hook for each of the following variations you may see in a pattern.
Working in the front loop
When a pattern says, “Work in the front loop,” it means to put your crochet hook under only that front loop. So you will end up with your hook poking out the top of your stitch between the “V”.
It may be abbreviated as FL SC (for single crochet) or FL followed by any of the other stitch abbreviations.
Working in the back loop
When a pattern says, “Work in the back loop,” it means to put your crochet hook under only that back loop. So you would end up with your hook going down through the middle of the “V” and out the back of your work.
It may be abbreviated as BL SC or BL followed by any of the other stitch abbreviations.
Working a front post crochet
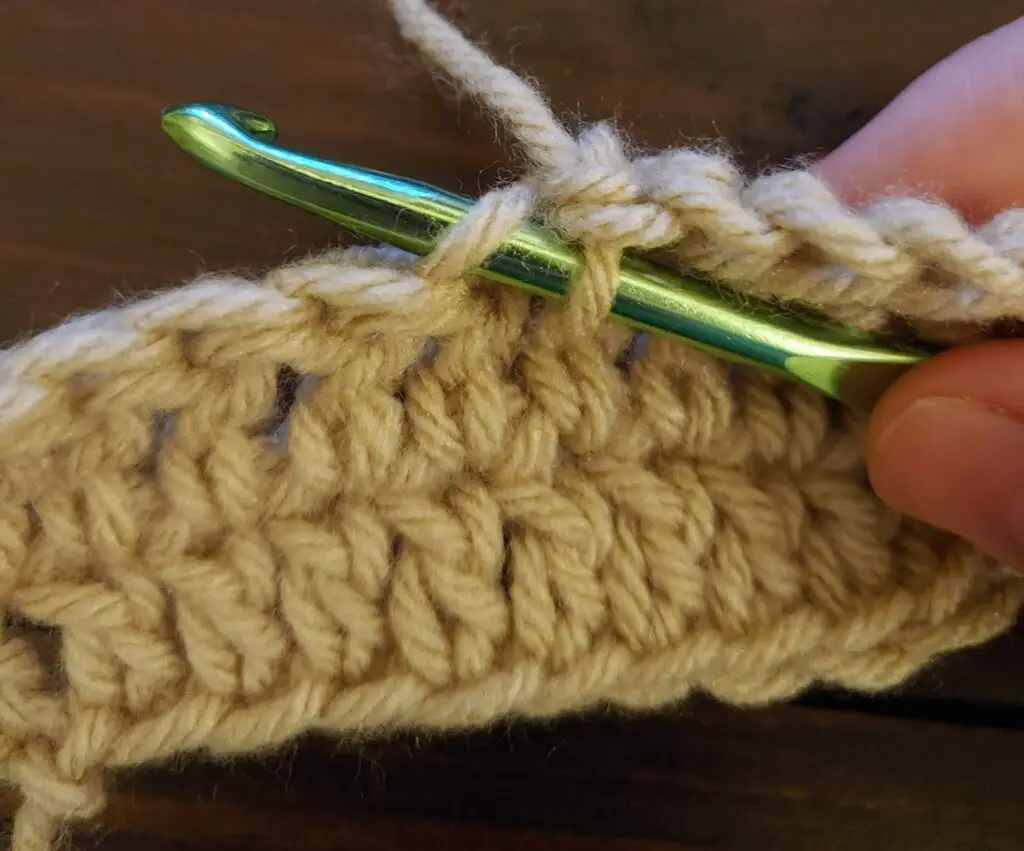
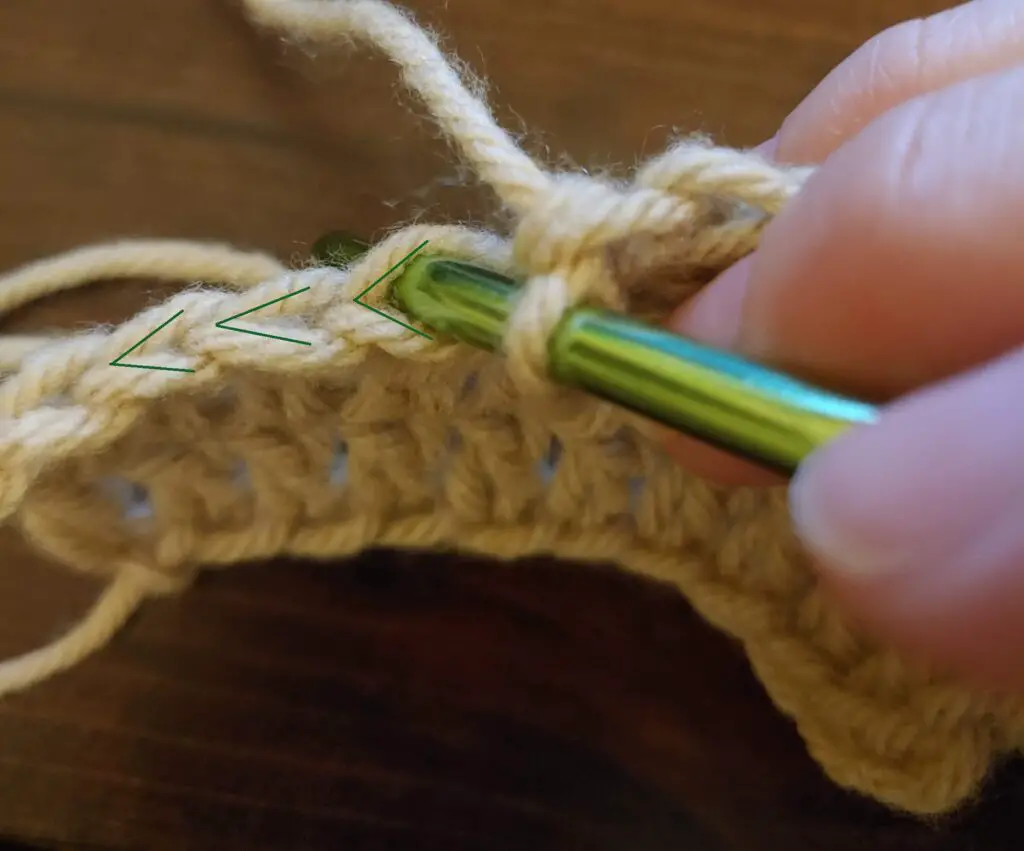
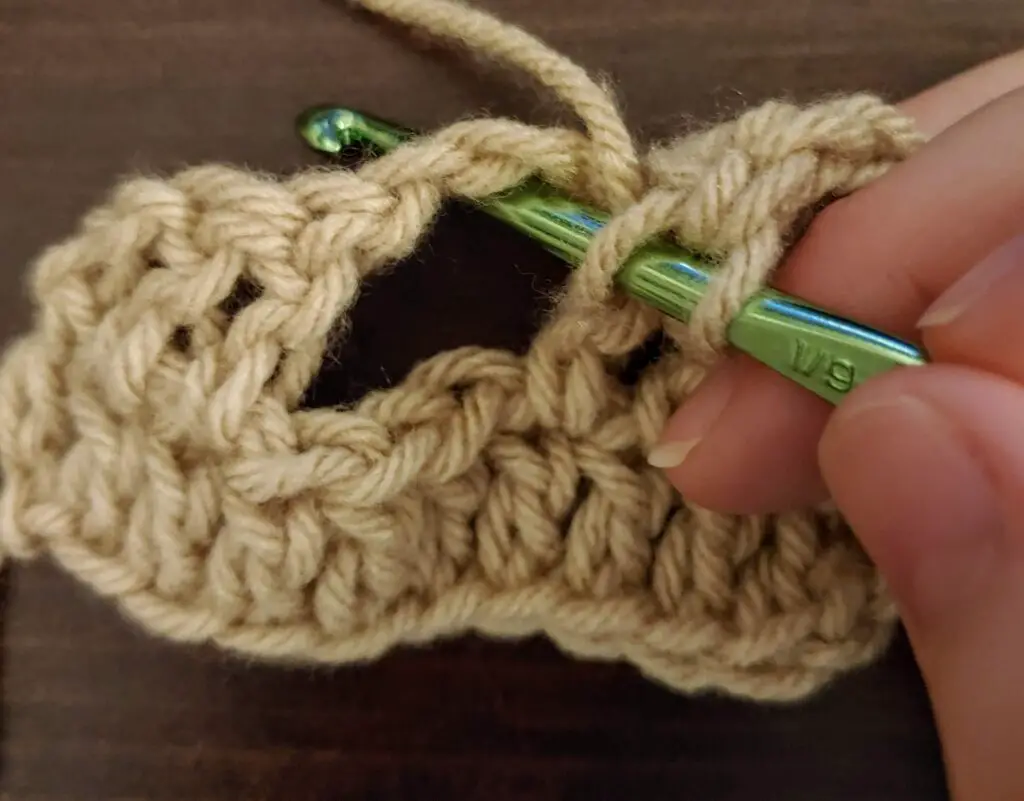
When a pattern says, “Work a front post double crochet,” insert your hook from front to back on the right side of the post, wrap the hook around that post, and come from back to front on the left side. The hook part of your crochet hook will be visible in front of your work, and the post part of the stitch will be over the front of your hook.
This is typically worked with double crochet and abbreviated FPdc. You may see it with other stitches, though.
Working a back post crochet
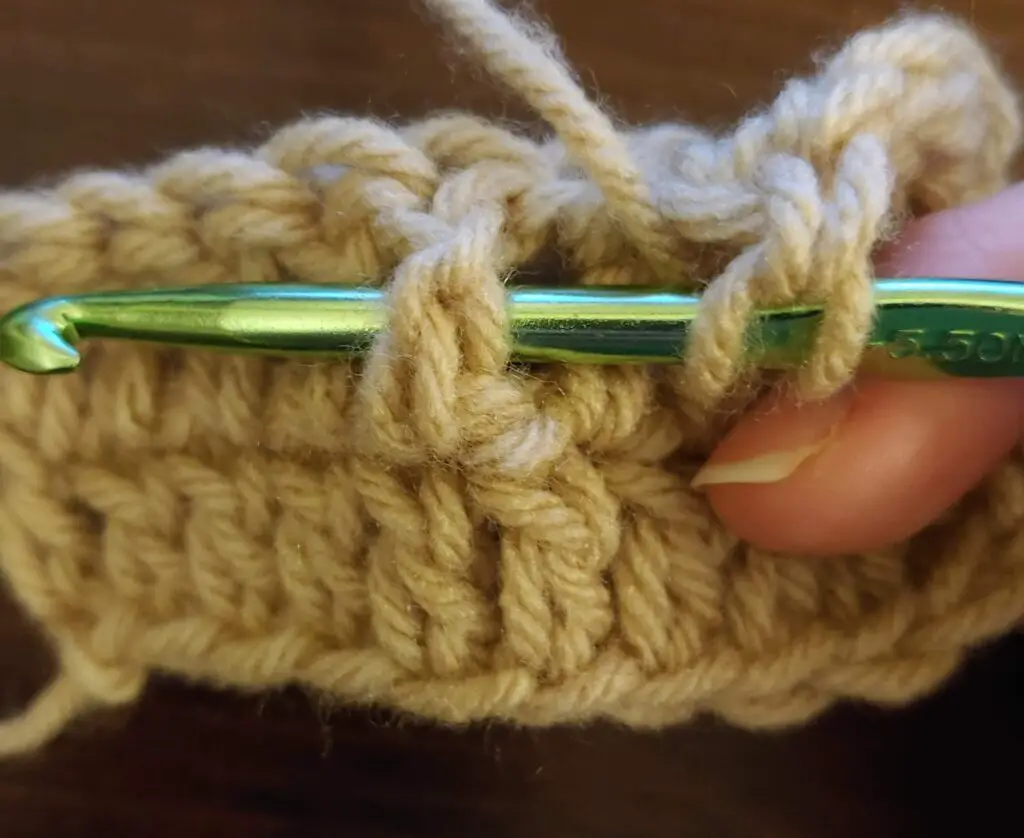
When a pattern says, “Work a back post double crochet,” it means to insert your hook from back to front on the right side of the post, wrap the hook around that post, and go from front to back on the left side. The hook part of your crochet hook will not be visible. It will be behind your work, and the post part of the stitch will be behind your hook.
This is typically worked with double crochet and abbreviated BPdc. You may see it with other stitches, though.
Where to Insert Your Crochet Hook When Doing the More Advanced Stitches
There actually aren’t a ton of changes in terms of hook placement for the more advanced “stitches.”
The only stitch that I can think of that is COMPLETELY different in terms of hook placement than all of the basic stitches is the Solomon’s Knot, which is an “advanced” open-work crochet technique. The stitch is not really hard to make, but it is SUPER HARD to describe using words. Really, you have to see it. So, instead of trying to describe it, I am providing a link to a tutorial; it will make way more sense. Here is a GREAT YouTube Tutorial on how to complete the Solomon’s Knot stitch from NewStitchADay.com.
In general, most of the openwork/advanced stitches are actually just variations of the basic stitches where you insert your hook into the same place for a bunch of stitches, or you use chains and then skip stitches. Here, I will discuss what you do if you are chaining and skipping stitches.
When you actually do the chains and skip the stitches, nothing is different in terms of hook placement when you work into a stitch. When you work the next row and come to those chains, though, it is often different. So here is the description of what to do when you get there.
Work into the “2nd” chain (for example)
Something a pattern will say to work into a specific chain where you chained a few and then skipped some stitches. In this case, you can choose any of the variations for working into that chain that is listed above. Just make sure you count the chains correctly.
Working in a chain space
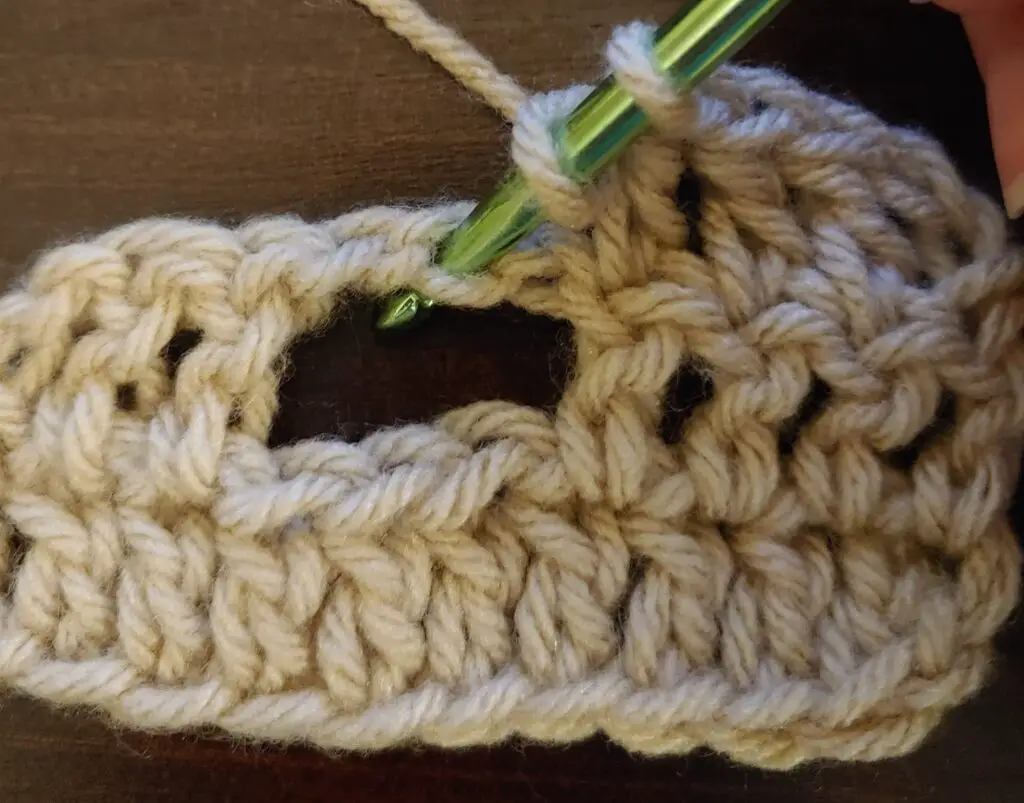
More often, a pattern will say, “Work into the chain space.” (Often abbreviated as ch sp.) This means to insert your hook in the hole (underneath the chains you made, not through them). You then work your stitches basically around the chains you made. Often, you will insert your hook into that same chain space multiple times to create multiple stitches, but not always.
Another variation of crocheting is called tapestry crochet.
This is where you make geometric patterns with various colors. This is not really complicated, but this post is only about hook placement. Tapestry crochet can be a WHOLE different post. So here I will just talk about a variation on hook placement when working a specific stitch in tapestry crochet.
This variation can be used for other crochet projects if you like the look of it, and you may run across it in a pattern from time to time.
Waistcoat single crochet
Note that this stitch has a variety of names. It seems like Waistcoat Single Crochet is the most common, but it is also commonly called Center Single Crochet. Sometimes, it is referred to as a Crochet Knit Stitch because it looks a bit like knitting upon completion, but there are actually other stitches referred to by this name as well. Yes, it is confusing.
Anyway, where do you place your hook?
Insert your hook into the center of the single crochet post.
When you are working in the round
If you look at the front of your work (right side), you should see a “V” for every single crochet (not the V on top of the stitch where the front and back loop is). You will place your hook in the center of that “V” for this stitch.
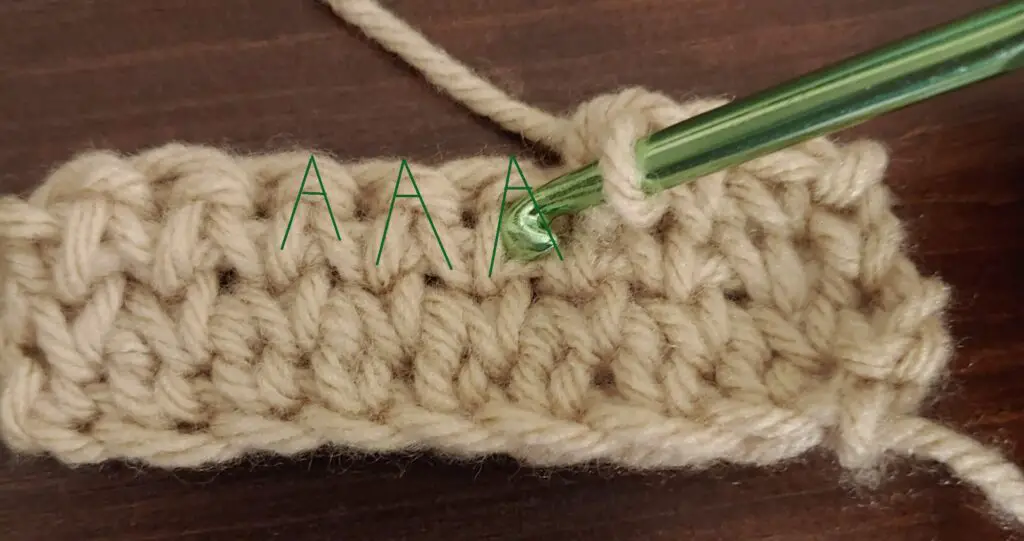
When you are working in rows
It will actually look like an “A” because you are on the back sides of the stitch. You will insert your hook in the middle of the “A” below that crossbar.
The purpose of this variation is two-fold in tapestry crochet. First, to make the colors line up better (it creates stitches stacked on top of each other instead of angled). Second, it creates a stiffer, denser fabric (good for things like rugs and backpacks often worked in tapestry crochet).
Wow! Who knew there were so many variations on where to place your crochet hook! Well, now YOU do! I hope this was helpful, and I hope you will try out some of the variations of making the stitches. They create various looks and textures for your work, so it can be really fun!
If you think of any other questions about this topic or run across another variation, drop me a comment, and I will answer the best I can!
Now it is time for YOU to get Crafty with Ashy! Show me your projects and let me know which methods you have tried in the comments!
Be sure to subscribe and follow me so you don’t miss any inspiration!