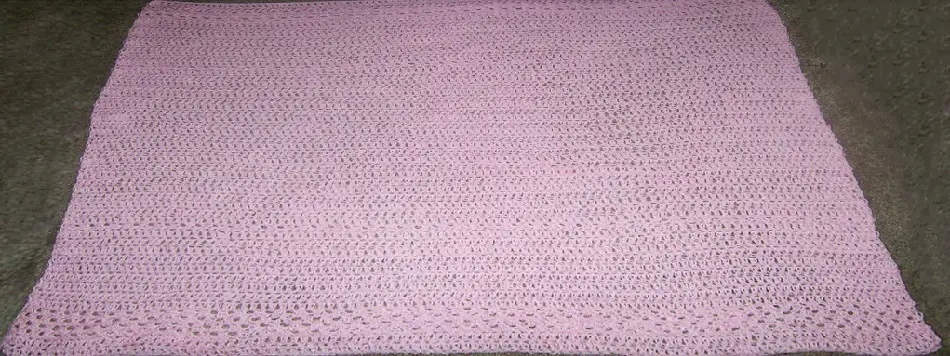
We all want our crochet projects such as scarves or blankets to have straight, even edges that look finished and professional. Uneven edges or a growing or shrinking project are a huge frustration for beginner and advances crocheters alike! Mistakes can easily be made, but here are some tips to make sure your edges look good!
Eight Tips for Preventing Wavy, Uneven, Crooked Edges on Your Crochet Projects:
- Count Your Stitches
- Ensure Proper Hook Placement
- Maintain the Same Yarn Weight
- Maintain the Same Hook Size
- Maintain the Same Tension
- Get the Turning Chain Right
- “Block” Your Finished Project
- Add an Edging
Each of these tips is a way to prevent uneven edges which can occur for many reasons in a crochet project worked in rows. Let’s delve into what each actually means and explore how to keep your projects looking straight and professional!
Tip 1-Count Your Stitches
This is the simplest mistake to correct, and it is an easy one to make. I mean, really, who wants to count stitches, unless you just love counting. (Okay, not gonna lie sometimes it is relaxing.) But truly, many times we crocheters are doing other things like talking to family, watching TV, working (zoom meetings anyone?). Sometimes we get distracted and don’t count our stitches.
You need to make sure you have the right number of stitches in each row or your project will be wonky. You could accidentally add or subtract stitches to the row. If you accidentally add stitches consistently your project will get wider over the rows. If you miss stitches, your project will get narrower. If you are inconsistent you will end up with a wavy project with some rows wider and some narrower.
You don’t necessarily need to count every single row, but you need to be prepared to have to frog it (rip it out) and backtrack some if you do have a miscount somewhere. (Unless you don’t really care about perfection, which if I’m honest, I often don’t.)
Tip 2-Ensure Proper Hook Placement
This one kind of goes along with the above, in that it can sometimes be caught by counting. If you put your hook in the wrong place, you could have the wrong number of stitches, BUT…you could have the right number of stitches and still have wonky, wavy edges.
Below are many of the mistakes you could make with hook placement. But, if you are looking for details/pictures/tutorials for WHERE to insert your hook to prevent these mistakes, see these two posts about crocheting in rows.
Where do I Put my Hook? Details of Where to Insert Your Crochet Hook
Crochet Rows: How to End One and Start Another and How to Finish Off
- You could put your hook in the wrong spot in the stitch and end up with two in the same stitch. You put one through the front loop of the stitch and one through the back loop, for example. This would result in two stitches technically in the same stitch, but in two different spots.
- You could put your hook between two stitch. In this case, you may work a stitch into the proper spot (under the “V” of a stitch, then accidentally put on between the “Posts” of two stitches. In this case, you would also end up with extra stitches in a row.
- You could skip the last or the first stitch of the row, or add an extra either place. To someone who doesn’t crochet, this may sound silly. But those starting and ending rows can be tricky. As a beginner, this was definitely my biggest challenge. Sometimes “turning chains” count as a stitch and sometimes they don’t and that is a big part of the challenge.
- If you are counting the turning chain as a stitch, you could miss putting a stitch into the top of the chain at the end of the row. You could also add an extra stitch at the beginning “under” the turning chain, which should be skipped if you ARE counting the turning chain as a stitch.
- If you are not counting the turning chain, you could accidentally skip the first stitch which would look like it is “under” the turning chain. You could also add an extra at the end if you accidentally work a stitch into the turning chain, though it is not being counted as a stitch.
- When using the single crochet, the turning chain is not counted as a stitch, but it actually can look really similar to the single crochets, especially if using a specialty yarn that hides some of the stitch detail. This was a big reason why my first crochet blanket (which was massive by the way, and I didn’t follow tip 1 in any way, and I was only about 8 years old) ended up SUPER uneven!
If you are counting your stitches, you could still make a mistake in placement, but have the right number. You may skip the last or accidentally put two in the last to end up with the right number, but you’ll have a wavy edge still.
For example, if you accidentally skipped the first stitch when the turning chain was NOT supposed to count, you may work an extra stitch into the turning chain at the end to get the right number. If you are inconsistent with this, you’ll end up with waves.
Tip 3-Maintain the Same Yarn Weight
Many crochet projects involve changing colors to make rows or patterns. If you do change yarns, it is best to use a yarn that is the same type (brand, weight, style, etc). If you don’t do this, you need to AT LEAST make sure the “weight” (thickness) of the yarn is the same.
There is actually a lot of variation within yarn weights, which is why it is best to use the “same” yarn, just in a different color. A weight 4 (medium weight) yarn in one brand may be much thicker than the same weight in another brand. I’ve honestly seen significant differences within a brand name too depending on the “line” of yarn. An example of this is that there may be a yarn marketed for babies that is weight 3 and one that is not “for babies” that is the same weight 3 in the same brand, but the baby one will likely be a little thinner.
The reason for this variation is that there is a range for each weight of yarn. The way it is determined is by counting how many “wraps per inch”. We’ll stick with the example of weight 3. Standard is between 11 and 15 wraps per inch. Yarn on the 11 side of that scale would be thicker than yarn on the 15 side.
A common reason for changing yarns is that sometimes you realize you need more yarn after starting a project, but the yarn you had was discontinued. (We all have a yarn stash with yarns that are years old, right?!) When you go to get new yarn, I recommend taking a little sample of the yarn you were using to try to get as close to the same thickness as you can.
If you use thinner yarn, your rows will look a bit shorter and thicker yarn will look longer. It may not make a huge difference, but it will do enough to make a slight change.
Tip 4-Maintain the Same Hook Size
This may seem obvious, but I know from experience, accidentally changing hook sizes can DEFINITELY happen!
I know I am not the only one that will start something, then just quit on it for a while. If you are crocheting and put it down for a while (months…years?), you may forget what size crochet hook you were using. If you happen to change hook size, it will affect the size of your stitches and result in different lengths of rows causing an uneven edge.
Funny story.
When my sister was pregnant with her first child, my mom started this super involved baby blanket with a TON of hexagons with different animal faces and different colors of flowers. She got about halfway done with making the hexagons and basically just quit on it because she wasn’t going to get done in time. She made a quicker fuzzy hearts blanket instead. Well, two years later, when my sister was pregnant again, my mom decided she would finish that blanket! (She had a specific pattern and knew the hook size, so thankfully, no problems there!) Years later, when I had my second child (This would be nine years after this blanket was started), my mom was clearing through her crochet stuff and found more of these hexagons that she hadn’t used in the original blanket! She turned them into a small car seat sized blanket for my youngest.
This just goes to show you, a few years sometimes happens!
Tip 5-Maintain the Same Tension
The hardest thing to master in crochet is maintaining even, consistent tension. To do this, you need to hold your hook and yarn pretty much the same all through the project.
If you hold it tighter and pull the yarn tighter around the hook, you will get small tight stitches. If you hold it loose, you’ll get looser, larger stitches. If you vary it within the same project, you’ll end up with wavy edges.
Practice is the only way to improve on consistency with your tension. Just like any other hobby or craft; practice results in improvement.
Even experienced crocheters can have tension consistency problems. Some reasons for tension fluctuations are the following:
- Fatigue
If you are getting tired you might tighten up or hold the yarn looser. I know that my forearm will sometimes cramp up causing me to actually hold the hook tighter. - Emotions
If you are upset or anxious, you might have a tighter hold. Our muscles react to stress by fired or tightening up. With that though, I don’t necessarily recommend stopping. Crochet is a scientifically proven way to help reduce stress and anxiety. It is good to be aware of your hold though, because you can consciously relax your hands which will help the rest of you relax also. Mindfulness for the WIN! - Doing something new
Learning a new stitch or a new way to grip the crochet hook or hold the yarn would all result in changes to your tension. When I taught myself the knife grip, versus my always used pencil grip, my tension got a lot looser at first. It took some time to get used to it.
Tip 6-Get the Turning Chain Right
This is a really hot topic, and there are a variety of opinions on what is “right.” In this section, I’ll discuss four different approaches to the turning chain. Since this post is about straight edges, I will say that the 2nd and 4th options do result in the straightest edges without a bulge.
In my opinion, the right one is whichever one you like the best if you are making up the pattern. If you are following a pattern, typically, I would suggest following whatever the pattern designer said to do.
So first, definition. A turning chain is used when going from one row to the next to transition the height to the one needed for the next row of stitches.
Standard turning chains
Standard is for the turning chain to count as the first stitch in the row (except for a single crochet). So when using any stitch that is not a single crochet, you would chain for your turning chain, then skip the first stitch and work into the next.
The standard number of chains for each stitch is
- single crochet-1
- half double crochet-2
- double crochet-3
- treble crochet-4
- double treble crochet-5
Some people do not like the gap created between the turning chain and the first actual stitch of the row. The gap is created because a chain is not a thick as typical crochet stitch. To address this, many changes have been suggested and are often seen in patterns.
Variation on the number of chains
One suggestion is to chain a different number, but otherwise follow the same idea. For this, the turning chains would be decreased by 1 for each stitch.
- single crochet-0
- half double crochet-1
- double crochet-2
- treble crochet-3
- double treble crochet-4
When doing this, I suggest pulling the very first loop of the first single crochet in the new row a little bit looser to address the height difference.
By decreasing the number of chains, you sort of pull the chain closer to the first stitch, and decrease the gap. It does not eliminate the gap though.
Not counting the turning chain as a stitch
This is a super common alteration as well. Many patterns will say that the turning chain DOES NOT count as a stitch. Typically the turning chain numbers called for in this case are the following:
- single crochet-1
- half double crochet-1
- double crochet-2
- treble crochet-3
- double treble crochet-4
After doing the turning chain in this case, you would work the stitch called for into the very last stitch of the previous row instead of skipping one. Some people don’t like this one because it ends up with a slight bulge on the alternating edges of each row giving a very slightly scalloped look to the edge.
Using a stacked or extended stitch instead of a turning chain
This one seems like a newer technique/suggestion from my research. A few different techniques have been suggested to make the “turning chain” thicker to avoid both the gap and the bulge. For these, the turning stitch counts as the first stitch.
Here are two techniques I have found to replace turning chains.
- You can do multiples of single crochets stacked on top of each other with two for a half double or double crochet, three for a treble crochet, etc.
- You could do a technique where you pull a loop to the height of o the stitch that you want, wrap that as “yarn over” around your hook, and then finish whatever stitch you are working with (half double, double, etc).
Tip 7-“Block” Your Finished Project
This is only sort of a way to “prevent” uneven edges. It is more a way to “fix” the edges.
If you edges are only slightly uneven, especially if it is only a small tension issue or a turning chain issue, you can use “Blocking” to straighten it out. If you have significant changes in size, blocking won’t be able to fix that.
Many patterns actually call for blocking to complete the project. Granny squares will end up more square. Anything lace, crocheted with tread and steel hooks, is blocked to stabilize the shape and details. Clothing will be “blocked” back into its proper shape/size after washing to ensure it doesn’t stretch out. It is a super common practice.
Blocking is basically stretching the crochet project into the shape you want it to be and then keeping in there. To block a project, you wet the project, stretch/reshape it into the right size/shape, pin it to a blocking board (if needed), then let it dry completely. The project will then keep the shape it dried with.
Tip 8-Add an Edging
Okay, this may not really be a way to prevent uneven edges…
Often times an edging is called for (even just slip stitching or single crocheting around) to get an even finished look for the project. This will “cover” the turning chains somewhat, and it will make all four sides look the same versus having the tops/bottoms of the stitches on two sides and the posts/sides of stitches on two sides. It is just to go for uniformity.
But….If you want to “hide” your uneven edges, you can add a border to your project. It is not technically a “fix,” but, hey, a frilly border can hide a lot of variation!
Related Questions
How To Fix an Uneven Crochet Blanket
The only two ways to “fix” an uneven, completed crochet blanket (or any project) are to block it if it only has minor variations or to hide it by adding a border. If neither of these things is enough to address the problem, the only option (if you really don’t want to keep it the way it is) is to frog it (rip it out) and start over.
Is Crochet Blocking Permanent?
Crochet blocking is NOT permanent. Any time the item gets wet, it will need to be re-blocked.
If you think of any other questions about this topic, drop me a comment, and I will answer the best I can!
Now it is time for YOU to get Crafty with Ashy!
Be sure to subscribe and follow me so you don’t miss any inspiration!